Category Archives: Other Projects

Stuff that does not fit any catagory

Triple E Surf Side Trailer #2 Intro

All tarped up for the time being.

But I squeezed in the video first.

Exterior Video

Interior Video

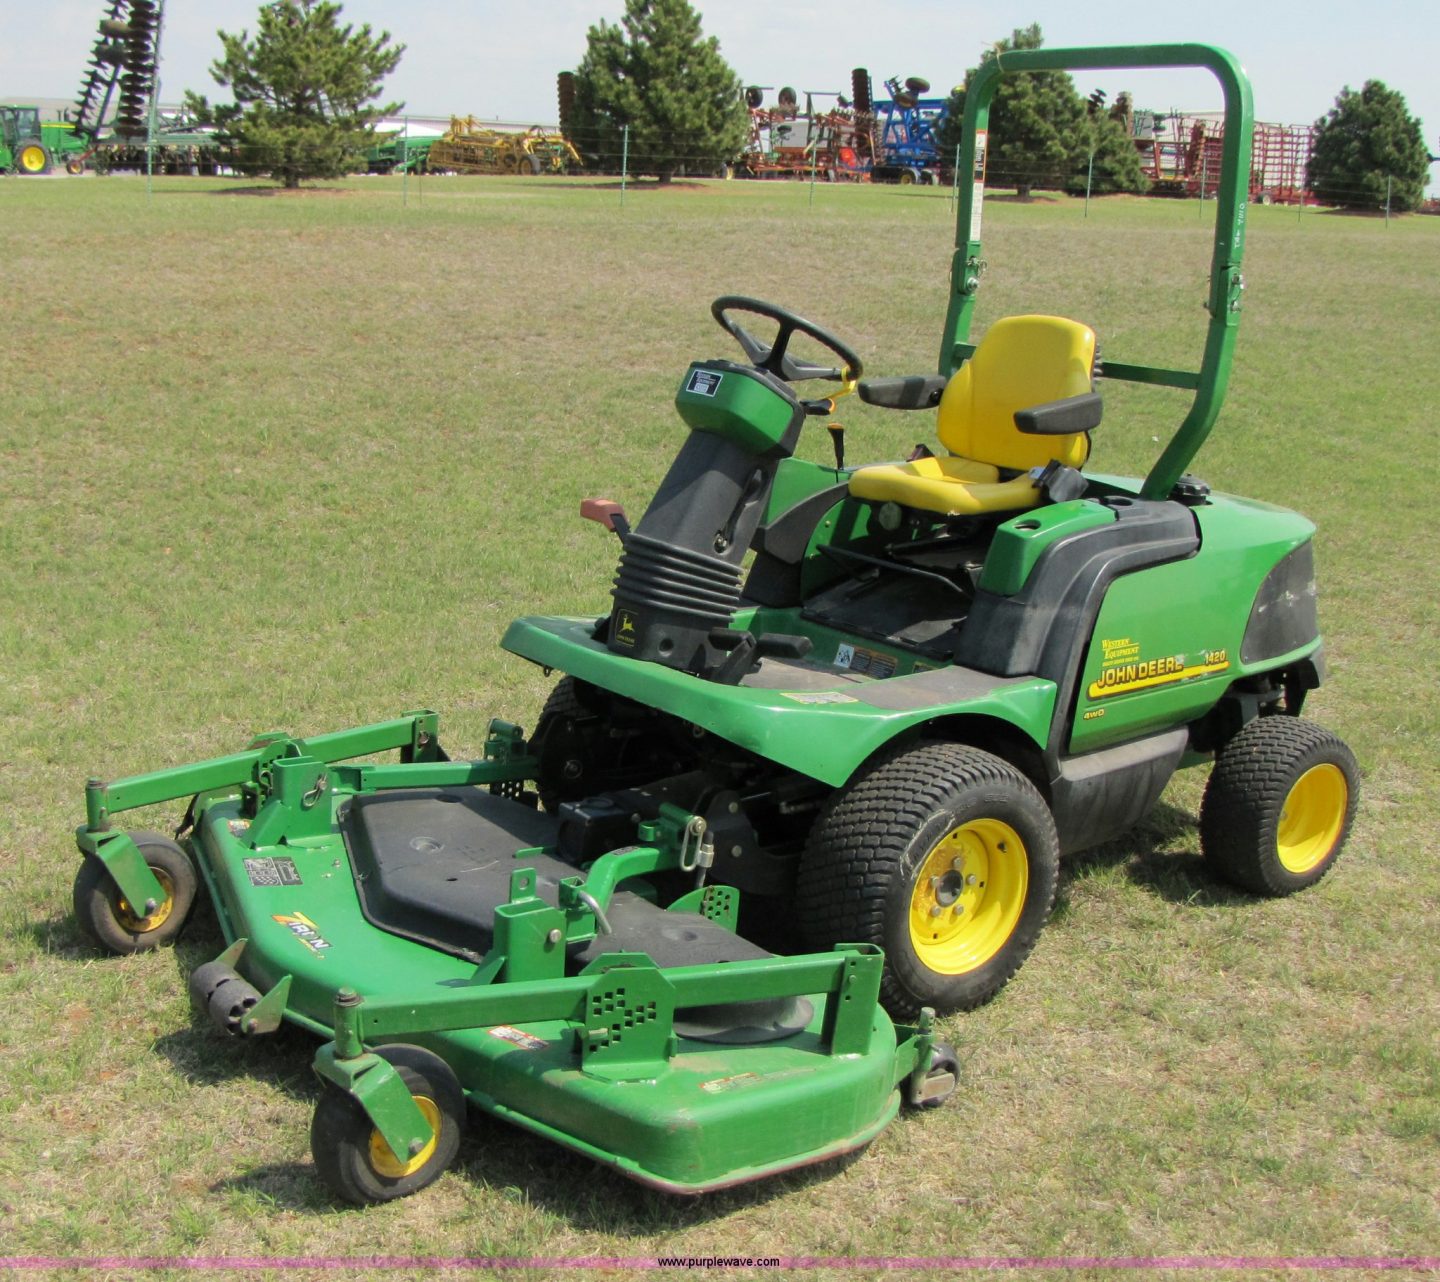
I would love to get working on this trailer..  But the John Deere 1420 is in the shop and we are still fighting with it…  Oh well but I did remove the broken lower hinge on the door. Sorta fixed it and back on. Not sure if you can get these or not.  But it turns out it’s not special like the Boler / Scamp door hinges.  A good stainless marine hinge will work.. may even be better.  So I’ll order those.

Let’s talk about the Trailer :
Was like this two tone factory paint

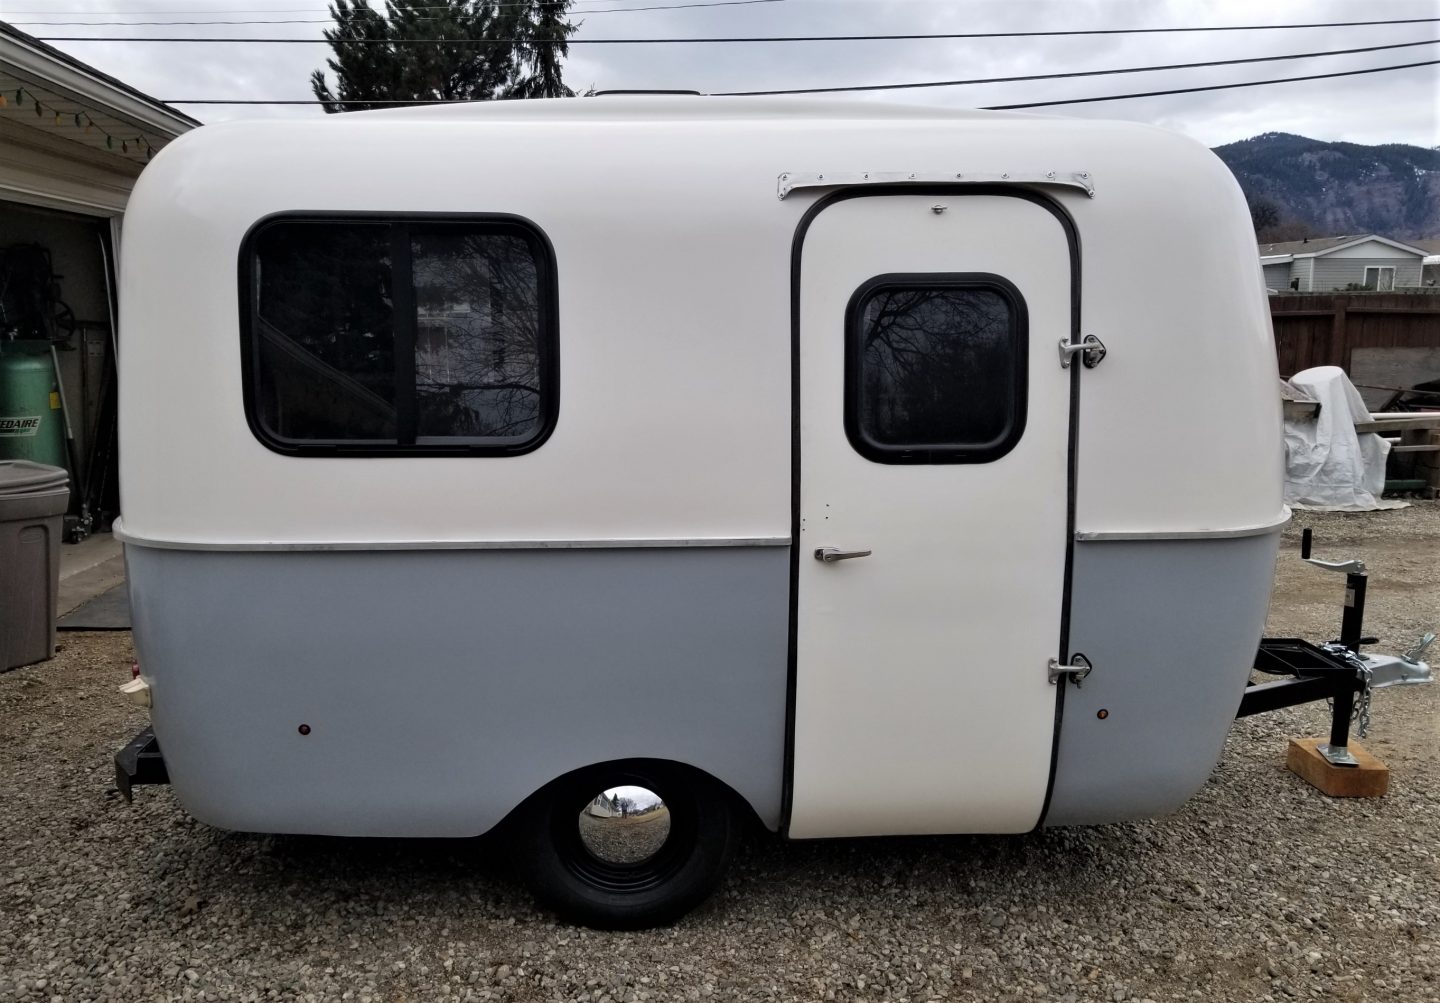
Looking up the history of the Surf-Side, and using the build sheet info.. it’s determined that this is a 1976 trailer.  Built in Winnapeg  Manitoba.  The model is a TM14. The GVW is 1650 lbs.  Making this trailer very light.  There is the same torsion suspension as a Boler. The frame looks a bit stronger and rises up at the tongue giving a better 14 inch hitch height.  Also the tongue is narrower and a longer reach making it less likely to be damaged by “jack knifing”.  As you can see below.

hitch

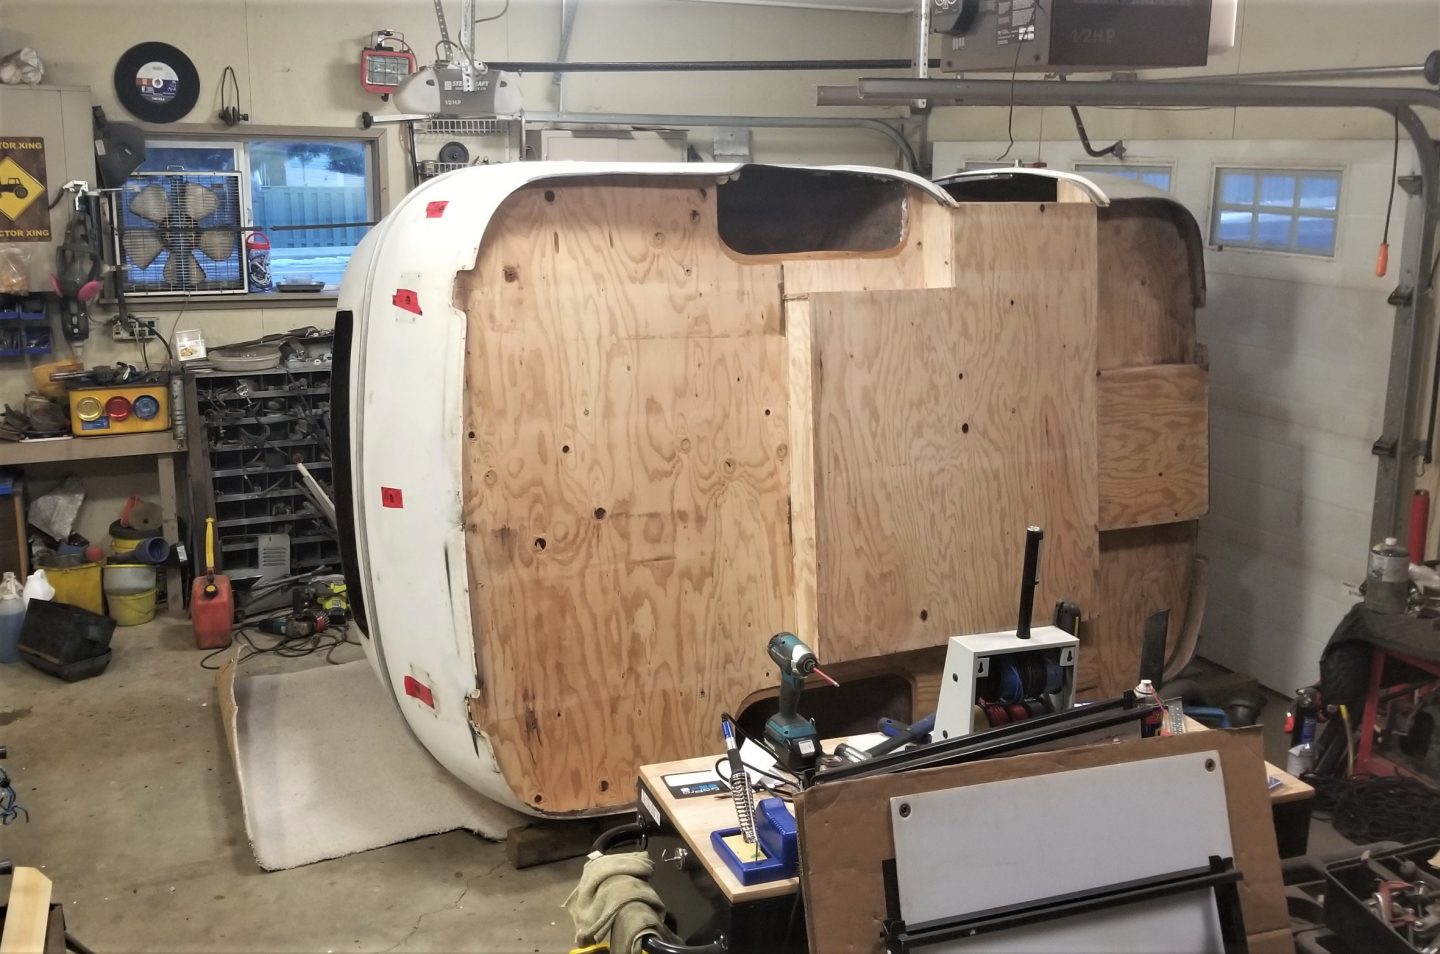
However seems someone found a different way to do damage to the left front corner ?

Owwwie

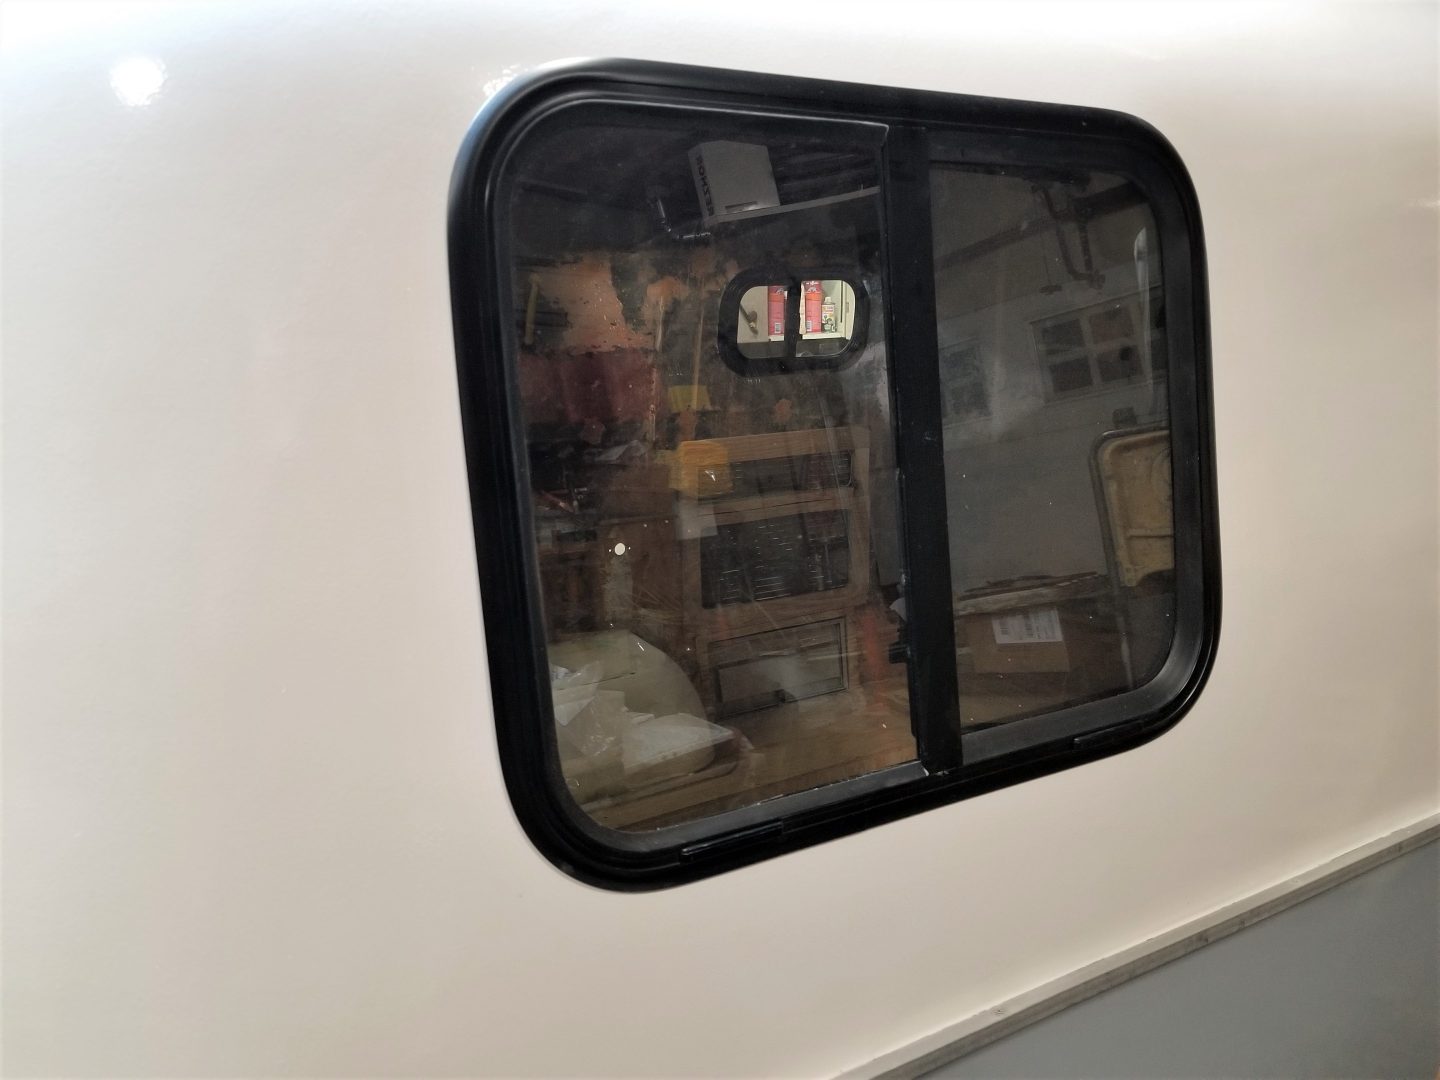
Fortunately it’s fiberglass and the body work is easy …and doesn’t have to look like this butcher job !   While we are talking fixes..  The roof has sagged down .. Most likely snow load.. and made worse by the missing kitchen cabinets.  Just like the Boler those cabinets help support the roof.  So that will be fixed when I build new cabinets.  Aside from removing the green paint the windows need repairing too.  Now more will show up I’m sure, but those are the obvious ones.

Further Inspections:
These look like Factory Tail lights

And too bad these are broken..  But I want LED lights..  so new ones for sure.   Notice the back-up lights.  Ya this trailer has brakes too and the plug WAS a 7 pin.. (missing) But the wiring is still there.   A bit overkill for an under 2000 lb trailer..  But I will keep it this way.

Under the rear

And here’s a look under the trailer.. Looking toward the rear.  This is cool ! the bottom is molded as part of the bottom half … One big happy tub.  No skirt hanging down like the Boler. This is so much like the new trailers are built..  Casita’s and Escape’s.  Needs a bit more framing I’m thinking.

The axle

This view shows the drop in the floor where the dinette ends and the standing area starts.  Interesting..  Looks like the torsion arms are trailing and up.  And the brake drums are visible.

Looking toward the front

So much for brakes ! The wires are hanging down and dragging on the ground.  Propane lines are seen here too.  Not a fan of holes in the floor but this is probably best .   All of this tells me that gutting the trailer and even replacing the floor would be very easy.

So we wait for shop space.   That will be  Page 3


Triple E Surf Side Trailer #1 New

Here we go…  Again !

After restoring two small fiberglass trailers the Boler  and the Scamp I had enough and was glad to see both gone.   But I changed my mind when this one was offered to me for free..   Yes free.  What can i say …I’m a sucker for an ugly trailer.. And more if it’s fiberglass. Starting from $0 is as good as it gets.  Now as usual I’ll show you a photo from the web of a nice one…

NOT FREE !

Nice eh…  It’s what it should look like…  But then it would not be free,  would it ?  Nope a free one looks like this…

FREE !

Oh ya someone got some free green paint and no sense of when to stop.  Unless your lazy and did not have a ladder …then the roof gets left the old color.  Like it did..  Sad.

Some body work needed

Today I towed it home.   Which makes it better in some respects.  Neither the Boler or the Scamp could be towed home they had to be loaded on a flat deck for that trip.. This time I did not even have to put air in the tires..  But lets share the story..  or what I know anyway.

It’s presumed this trailer was given to one of our street folks.  Whom had someone park it for them up one of our forest roads.  CO tells them they can’t do that and have to move..  So they make a deal to park in my friends RV park…  But they don’t pay the rent ..  and after a few months sneak away at night.  This trailer sits there locked up and waiting for them to return for the stuff they have horded in side..  Nope months go by and they are gone ..   The RV park is sold and the new owners want it gone..  Who ya gonna call !  Rob.  Now I’m going to say the above story plays out everywhere.  The bleeding hearts say these folks need help , community support and a place to live..  sure so long as it’s free and there are no rules. And what’s up with all the stuff ! Just wait till I start going though the STUFF in side the trailer … God only knows where it came from ?

The shit show

What is the first thing to do ?  YA find the floor..  Some of the stuff is good ..  Here’s hoping the fridge works.. but I’ll not hold my breath. I need to find a tag or plate with info about the year or Vin number.

Found It !

Both the floor and the Vin number.  Today cleaned out the whole trailer Filled my utility trailer for a dump run.

Inside the closet door.

This was one of the things I was looking for..  The factory build sheet.

This was the other thing… The floor.  Found a few treasures, Too much to list.  But most is off to the dump.  The trailer is now empty. Ya got all the proper cushions..  But they are 40 years old.  Aside from a filth the trailer is in good condition.  Missing the kitchen though..  BUT all the cabinets are wood and can be modified or built to whatever you want.  I have sinks , stoves and another small fridge . And several bins of RV parts..

So I’m going to tarp it till I get to working on it .  And then I’ll start a    Page 2

2001 John Deere 1420 Mower Page 2

Let’s fix the motor and get this puppy running !

And the root problem is the carb.

Carb being cleaned

And so a few parts have been ordered. Anew float needle valve, gasket, and new shutoff solenoid.  The last one is a pricey little thing.  The bad oil has been drained and a new filter installed.

Well new oil …carb all clean and back in… still won’t start.  Gone over and over the wiring , sensors and coils to try and find the problem.  Cleaned all the connections.  and then I found this.

One of the magnetic pick ups for the coil was bent back.  So that cylinder would not fire.  So I cleaned all of three of these and set the gap for the best pick up..  works all three plugs are working..  But the motor still refuses to start.   SO  I’m kicking the John deere to the curb for awhile..  Outside all covered up waiting for my patience to come back.

Jan 2021 … Update:

A friend of mine wanted to take the John Deere over to his shop and see if he could have luck with it.  And he did .. got it running  !  So I went over and helped him put some of the bits and pieces back on..  He bought a battery and we took it for a run outside.

Proof..   So I’m fixing up the seat..  The bottom cushion is at the upholstery shop..   All the hydraulics work perfectly.


2001 John Deere 1420 Mower

This is a new project for the winter !

Same model different mower deck

Not mine but same model…

Arriving in the shop a tad early for winter.. however you wouldn’t know that when you look outside.  We got a pre – winter blast of snow..  about 4 inches.  Enough to play havoc on the roads and catching us off guard.  I came home from camping early and avoided all the problems..  Some were not so lucky.   Any way back to the JD..  It was a trade..  Back in 2018 I bought home a Cushman front deck commercial mower.  Powered by a Kubota Diesel motor.. It’s the diesel that made it all worthwhile and taking a chance.  Did not know if it would run .. needs a bunch of work..  But it came with a few attachments .. snow blower , mower deck and a scoop bucket?

Old Cushman Front mower.. history unknown

And so I made a trade for this …..

Our JD1420… rear hood removed

He wanted the snow blower more than I did..  But I think I did ok.  Ya it looks good .. But !  back in August  Dave and I made a trip down to Richmond to pick up two things from the auction for the boss..  this was one of them..  Bought with only seeing photos … it was supposed to be a 2006…  and was supposed to be a diesel.. and it was supposed to be running. NOPE! Turns out to be a 2001 and a gas motor. NOT running.  So there was a settlement of sorts which I have no knowledge.  No mater.

Drivers controls

This is a F1420 model, Yanmar 28 hp GAS motor,  Hyrostatic drive,  62 inch rear discharge triple blade deck with hydraulic lift .  As you can see the steering column tilts , the seat has long travel suspension.  Commercial duty.  There was “City of Richmond” decals still visible.

Dave and I tinkered with the motor when we got it home this summer..  It was almost seized.. we managed to get it turning… and very briefly had it running. so long as we poured fuel down the carb.  Fairly sure that water got in through the open air cleaner and into the cylinders rusting the rings. There is water in the oil and the carb needs a good cleaning …for sure the fuel shutoff solenoid is rusted shut .  Bad fuel won’t help either.  And the first thing is to get it running .

AH HA !  tucked into one of those document tubes used on trailers..  Look what I found..  Proof !  2014 wasn’t that long ago.  This puppy was roaming the parks and other grassy areas of Richmond, BC.  Cast aside for newer fancy one I bet.  Parked in the back lot … un loved and destined for the auction.

Look what I found !

I couldn’t for the life of me understand why there was this ring around the fuel filler.  And what looked like a satellite radio antenna.  So I removed the front cover from the steering / dash pod.  ( needed to get to the warning lights )  And I find this all wrapped up.

GPS tracker ?  nope.  Looked it up.. It’s a fuel usage monitoring system.  Transmits data to someones computer just to track how much fuel is being used.  Seriously ! why not just keep a log book at the pump ?

Mystery ring around the filler

Think of the money spent on installing and signing up to this tech company for every vehicle in the Richmond fleet …  wow.  I’m sure these aren’t free..  Why not remove it to use on another machine.  Waste waste..

So let’s start a new page as we get to healing the motor….

Page 2


Old K-Mart 4×8 Folding Trailer PAGE 3

Finishing the Trailer :

If you landed here first then go back to page 1  get the whole story

Once I joined the two halves together upside down it’s easy to do a good wiring job..  Consideration for the folding must be made.

This is were I do things a bit different..  First off I use loom to protect the wires,  Mostly the vehicle plug end.

A hole through the tongue on the left side and the loom passes through that with a tie so it can’t be pulled out.

The other thing I do is run the ground wire directly to the lights instead of relying on the frame as most do. This is far more reliable on any trailer because ground connections to the frame can rust and become poor. Plus this trailer folds up and there is two painted hinge points that would not allow ground to work well.  Bright ideas means bright lights !

Here’s how I solved the hinging problem..  Enough of a loop to accommodate the folding but keep it tucked up..

When the trailer is flipped over this with be the right hand light.

And here we go..  back on it’s feet.  Fenders and axles back on..  Wiring all done.  Just a coat of stain on the deck and it’s ready to hit the highway.

The lift table is SOOO great..  just roll the trailer over and lift to a comfortable height for working…

Well it’s all done and listed for sale..  She’s a cutey ..  folds up and stands up like it should.

And it’s still a very useful 4×8 trailer.   Nice and light.

End of this post..  it was fun …  Rob

Old K-Mart 4×8 Folding Trailer PAGE 2

–Cleaning & Painting :

If you are landing on this page ..you should start from the beginning .. PAGE 1

Well I looked at the frame sitting on the saw horses out side .. and it looked like a real chore working on it..  SOOO   I took the whole thing apart… all the nuts & bolts.  They were rusty and some of them broke.

Now I’m left with just a pile of metal pieces that are easy to clean.  These cross pieces are all the same …so they can go in any order.

Same goes for the stake pockets..  I bought all new bolts to put it back together.  AND !

I’m keeping the folding ability.  These are the hinges,   all they need is a good cleaning and a bit of straightening.  I will also need to replace the angle iron feet the the trailer would rest on when tipped up for storage.   The weather turned to rain so I had to bring the whole works inside.

The whole trailer ( minus the wheels) is here on my lift table.  All cleaned and ready for painting..

And we have it..  just like new!  I”l let these cure for several days.  Then when we have a nice day I’ll go get a sheet of plywood and put the puzzle back together.

All eight stake pockets are spiffy again too.  Everything has a nice coat of paint now.  And it cured enough to put back together.

Here’s the front half of the frame..  like putting a puzzle together.  I left the bolts loose so I could use the plywood floor to square the frame up.

Of coarse I put a coat of stain on the underside of the plywood.  That’s 5/8 ”  GIS plywood fastened to the frame with 1/4 ” galvanized carriage bolts.  Not SCREWS !  This is strong and will last for many years.   Screws will become loose and rust easily…  bad!

Like I said all new bolts with locking nuts are used .  The stake pockets are on now too. Ready for wiring and lights.  Let’s have another page for the finishing …   PAGE 3

Old K-Mart 4×8 Folding Trailer PAGE 1

Yes K-Mart !

Here’s the proof…  These were kit trailers ,  they sold them in a box ..you bolt it together.  There is no welds…all bolts holding the frame together.   Can Tire , Harbour Freight and others sold them.  The date says 1995.  Sure why argue with that 25 years young.

How did I get it ?

Someone was moving across Canada and selling things like trailers.  Cheap and with registration.  That always catches my attention. Doing the ubiult thing is a pain.  So I put more value on a trailer with papers.    And this is what it looked like… Kinda home made.  Little 8 inch wheels hiding under there.

I could see that there was another trailer hiding under all those wooden parts.  The lights were broken and the wiring was hanging down… but sorta worked.. didn’t care.. I replace that stuff anyway.

Time to see what’s under this mess.  Maybe mess is too harsh.. cause it did work for the guy..  Sooo  out comes the screw gun and the crow bar.

I get down to this and there’s a legit 4×8 trailer .. with fenders , stake pockets and lights.. (however the left taillight is missing).

The plywood deck is actually ok..  but there’s too many holes from screws.  So I think I would replace it.. Need to repaint the frame anyway ..it’s a bit rusty.  Needs new tail lights and wiring ( done right).  Make new sides and there you have a good trailer.

Let’s Fix it  !

The first step is to strip it all down.  So just the basic frame is left.  Amazingly it’s not super rusty… and just like the registration says it’s grey !  I’ll keep that color on the frame but use the tough black paint on the axle , hubs and springs.

Here’s the plywood floor with a few of the bits and pieces.  I will be replacing the 1-7/8 coupler with a new 2 ” coupler.  And the bearings will be checked for excessive ware .   It was discovered that this trailer was a folding trailer. The 8ft deck folded in half and the tongue folded up too…so you could store the trailer in a small space.  Someone added some welds and a few bolts to make it rigid.  And that’s fine.

This solves the lights and wiring …as well as a new 2″ coupler.  I have 3 of the wiring kits.. So it’s nice to find a home for one. Bearings however have been a bit of an issue.  The hubs had play in them.   Seems the standard trailer kit is not a good fit.  Fortunately one of the four bearings was good and fit ..  so with the number we were able to order three more.. Once the hubs are good  then we are down to the cleaning and painting.   Let’s do a Page 2

12 ft Kencraft Boat

Well I don’t need any more projects..  But this isn’t one..  ready to go and kinda special.

And I have to admit it was the bimi top that sold me..  Also i prefer Fiberglass boats to aluminum..   They don’t leak when they get old.  But this boat isn’t old …. as boat go 1995 Kencraft made in Port Coquitlam.  Very sturdy, with good free board ( height of sides), so if the lake gets a bit choppy no worries.  The motor is a 15 hp Tohatsu (Nissan) 2 stroke outboard.  Runs great…also from 1995.  Lots of goodies came with the boat …  fish finder with GPS,  down riggers, rod holders, Storage cover, anchor, and a few more small things.  The trailer is great …new axle & wheels, LED lights ..

Even a spare (new) 6 gallon fuel tank.  The whole package is good to go… but not perfect.  Here’s a short video .. We took the boat out to Christina Lake for a shake down cruise.

Beautiful day on the lake …  And we are finding some things that could be improved.

Trailer :  I don’t like the 1-7/8 coupler …  I like 2 “..  everything else is 2 ”  so that needs to be changed.  The wiring & 4 pin plug are wrapped with tape..  I like to use loom.  Need a 12″ spare tire too.

Motor:  Just a bit of tuning.. maybe new plugs.  maybe touch up the scratches..

Boat:   Needs more weight up front.  So move the fuel tank , could use a polish…  maybe a nice blue stripe…  Hmmm.

And those seats are very comfy..


New Yard / ATV trailer (little)

The one I bought is ok.. just ok.  It is 48 ” long but only 40 ” wide.   I wanted one that was the same width as my ATV.   Solution..  build one.  I have the old axle from the Scamp trailer.  So I bought a set of new 8 ”  wide trailer wheels that fit. 

Nice !  but the axle is wayyy too wide.  So I cut 24″ out of the middle. That put the wheels on the same track as my ATV.   I also wanted more clearance for traveling over things in the bush..  So i turned the axle 45 degrees so the arms point down.

Mounted that up to some angle and we have the start of a tiny trailer.  Then build a 4ft x 4ft  frame with steak pockets and that is the size I wanted.

Made a tongue that allows the deck to tilt..  and  there you have a tiny trailer !

Added a stabilizer jack from an old tent trailer, and a new 2″ coupler.  Prefect !  Now I’m painting up some 1/2 ” ply for the floor and sides.

And yes the wood parts are blue… just like the ATV.

1982 Frontier Class B+ Page 2

It’s spring !

And the Frontier is on the TODO list..

Soon …very soon I will be moving the Frontier to the driveway in front of the garage and start working on the list.  But for now I’ll pre – – build some of the panels so they are ready to install.

Here’s the charging / info panel that will mount below the thermostats and the existing panel.  Powering this on will give me an accurate battery level.  I also made a smaller USB panel to mount near the dinette for charging and powering electronics.   I’ve checked out the wire routing and I can do this.

The Frontier is in front of the garage now and I stared work .  One of the first things was to get the “tuck” tape off two of the hatches.  Yes that was the fix for doors that would not stay closed !  My fix was to install new latches…  done.   And I’ll stick to working on the outside for a bit..  Removed the bush bar Spare tire mount from the van.  It’s getting a new paint job in the shop..  And with a color matching the van.

I can use the same paint to touch up the rust spots on the van.   Oh and the Frontier got a bath…  a good scrubbing for sure..

These photos don’t really show the difference.  Maybe this one does..

Yup looking spiff.   When the weather warms up I’ll do some wax too.  In the mean time I really needed to get the roof and the vents sorted out..

This will be part of that work.  A new Max Fan for the rear vent opening..   And vent covers for the other two.  In fact everything on the roof is getting attention.  It’s taken two days but I got the roof to where I can say it’s leak proof.   New vent covers , New fan, New plumbing vent cover..  and the TV antenna is removed and nicely patched.   Let it rain !

time to investigate more of the secrets inside the cabinets..   First off the mystery Bus heater..  It runs constantly when the ignition is on..  There’s a thermostat on the wall that is suppose to control it.  Not working..  So I took the panel of..  and found this green thing ..

Well it’s an aux heater..   plumbed into the motor coolant lines.  And it appeared to have a small leak !  And the control box  was most likely the cause of the control not controlling stuff..   I thought about it and I really don’t need this heater..  So here it is ..  and the long hoses connecting it are gone.  Now I have a power wire I can use for something else. and more storage.

Nice day today.. So I got to work installing new Led lights..  Then I could get the vent trim back in place.

This new light takes care of the holes left from the TV antenna.   Over the table it could be handy.

This one is just a bonus… wires were handy.  Next the light over the sink..  The lights over the couch and the dinette are remaining the old ones they are cool and work good.. just changing the bulbs to LEDs.   Because of the circumstances in the world and here in BC  going camping is not happening for awhile.. so any more work on the Frontier will wait till other things are done.  I have a list..

It’s May…  the weather is getting warm..  but the camping season will be delayed till the Government opens up the camp sites.  My work on the roof has allowed the Frontier to stay out in the driveway ready to pick away at some odd jobs.  Like the rusty patches on the front of the hood.  And the paint chips .

I matched the paint very well and hard to tell unless you get very close.  Once this job is done I can re mount the guard on the front..

Done!  The real purpose of this is to hold the spare tire.  I’ve taken the dash apart and wired the new stereo properly.  But I still have more wiring to do..  like running lights.

Some things won’t get done..  but new things have popped up like the power converter.  And it had to be fixed..  Luck for me we had a spare..  newer one too!  While doing that the closet floor had to be removed …So all those issues got fixed.  Also the USB / power center got installed .  The whole interior got a good cleaning and all the appliances tested..  Ready to go.


79 Scamp / Acorn Restore page 6: The Re-Assembly

Now that the painting is done and had time to cure …  it’s time to get this puppy buttoned up…  Spring is here and I need the shop for other things.   And I’ve decided too sell the Acorn without doing anything to the interior.  The decor is a personal thing..  I provide the solid “like new ” trailer and someone gets to personalize  it.

The windows are going in..  and the door is next.

Also the fridge vents are painted and back…

Today was a very nice day..  Perfect for putting the body back on the frame… and we did just that..

Now I feel confident enough to mount the door and adjust it properly.  Once that is done then just need to wire up the running lights and install the roof vent and it’s good to go..

Well and bit of a snag.. the door is not fitting !  When I bought the trailer the door was mounted but hanging down because the floor was cut away on the hinge side..  So there was no way to see the fit..  It’s obvious the door in a newer one and not the original.  The problem is there’s not enough curve to match the door opening.  Now it could be taken apart ..a template made and the curve changed..

Here you can see the gap at the top….

And the bottom too !  When I formed the body I was careful to keep the door frame parallel and straight ..   But the curve is molded into the body..  and the steel brace behind the hinges is pre-bent to the proper curve..  ?  So what to do..   I have an idea..  temporary but will keep the rain out .

Well the Scamp is done !  Outside and for sale.  Looks good with the moons on the wheels.

The ride height is good.   The lights all work as they should.  I’m putting all the cabinets back in place..

So now we will see if someone wants a bit of an interior project..

And yes they did… SOLD  to nice folks from Kelowna

2013 Husqvarna Swedish Mower

I found a used one !

These are pricey little mowers.  And that’s why they didn’t sell very many in North America.  So finding a used one is great.  New ones are twice the price of a lawn tractor.  But they do mow better, turn sharper and maneuver around better.  And one of the best things is how the front deck pulls out and flips up for cleaning and blade changes…  very slick !

The other cool thing is the articulating steering…  just like a big loader these bend in the middle ..  Quite sharply too.

These mowers could be bought as an AWD or just rearWD.  The one I got is the later.  Three different decks were offered too.  I got the big 48 inch side discharge deck.  Most were mulching smaller decks like the ones in the photos.   Here’s mine….

I saw these many years ago at the equipment stores in Calgary…  And was impressed with everything but the price.  And now I’m happy to have one …  and this will take over the lawn cutting duties from the Kubota 1850 .   I hope it’s as reliable as the Kubota..   The Kubota has been having over heating problems when running the 52 inch mowing deck .. only..  everything else works great.

The power is a conventional Briggs 20 hp V-Twin..  And it drives a hydrostatic  transmission and a belt to the mower deck.  Easy to service and simple.  And I like foot pedal operation..

Yard work has begun !  And I have been using the Husky quite a bit..  Without doing anything to it ..  It’s running great !   I love it.   when the shop is clear I’ll get to sharpening the blades.


79 Scamp / Acorn Restore page 5: The Body Work/ Painting

There is not near as much body work needed as was for the Boler.  No pool paint to sand off..   While the body is still laying on it’s side I’m going to fill the holes in the roof and modify the roof vent..

And then with a little help..   The Acorn is back on it’s feet (wheels).

Ya we rolled it inside the shop..  Only a little grunting..  Now I can get the body ready for paint..  That requires filling holes, cutting the side windows bigger, and finish up the roof vent.  I have already fixed the lower skirt in the rear of the trailer…  so we are part way there.

I’m almost ready for paint !  just cutting the openings for the three replacement windows.

Slightly larger radius windows..  Good thing we are doing this now … I realized the holes in the corners needed filling.

This was the only crack I needed to repair.  And I believe it was caused by the weight of the door without any floor or any thing to support it.  But !

There was a hole for the heater that I don’t have..  So I patched it..

Now ready for painting…..

First step is the primer…   Bushed out the places the roller won’t go and all the patches..  so I can see how they look and if a little touch up is needed before the paint.

And there you have the primer… just the first coat….

And moving right along..  After the second primer coat was dry..  and sanded..  I’ve got a first coat of the white & the gray ..  I’m needing more of the whit so it’s off to Kelowna for more..

Still needs a second coat on both top and bottom.. but you get the idea..  Scamp’s were normally all white.. but not in my shop..  I figured the gray would balance the trailer and it’s neutral enough to be pleasing.

And now with the second coat..  the Scamp is not looking shabby ! So on to the interior painting.  I got some really good paint for that..  But first I’ll need plywood glued behind some of the things like the fridge vent covers, water fill and drains and the electrical hatch.  Reason…  no more rivets..  I’m using stainless steel wood screws.  And they won’t hold in just the fiberglass walls.

Now it’s time for putting things back together…  New post

Re-Assembly Time… Page 6

79 Scamp / Acorn Restore page 4 : Glassing the floor

Well it’s December… it’s cold and time to get to work on the Acorn…

Just like “Scrat” here the Acorn trailer is a lot of work…  And replacing the floor was no easy task.  The body is held up by the floor and the floor sits on the frame…  All three must be strong, it’s the integrity between the floor and the body that is key to the trailer’s life expectancy.  The floor completes the “egg shell” .   Now that the floor is installed and glassed to the body on the top side…  I need to do the same under the trailer too.  Only one way I see to do this is to lift the body / floor off the frame and roll it on it’s left side to have access to the whole bottom.  Without the windows and no door the body is light..  but i will need to install some braces inside to keep away any sagging .  First thing to do is build a dolly that will cradle the body on it’s side.  With wheels so I can roll it into the shop.

So I built this dolly…  We lifted the Acorn from the frame ….rolled it over… and!!  It was too tall to fit through the Shop door !  Fine… Got a piece of carpet and we slid the Acorn off the dolly and into the shop.  Good thing it’s not too heavy..

And there we have it..  Looks like it fell over and died..  Nope all is good..  Easy to work on the underside now.

Got up this morning and SNOW…  boy did we get the Acorn inside on the right day !  Not a lot of snow …just an inch..but makes it hard to lay on the ground and jack the body off the frame.  Going to leave it in the shop for a few days to warm up and dry out ..  Seems the tarp was leaking a little but no damage done..

Here’s a small video I made…

I don’t seem to have a lot of ambition around this time of year.. but the Acorn is there when I do…

It’s into February now and I’m doing my best to get this bottom all done…

Here I have all the glassing done.. It’s taken weeks and a lot of resin..  But I got R done…  And then came the decision of what to cover this with…  I want it black..  And i want it to further protect the underside of the floor.  I thought about epoxy truck box liner..  But the price was very high..  This is more area than a truck box..  So it takes two kits..  I settled on good old enamel..  same as the frame.  and it was easy and quick to roll that on..  Two coats and we are done.

Next is to attach a dolly to the underside ..  and  while the roof is easy to get at I want to enlarge the vent to a 14 x 14 normal vent size.  And I want to glass a wood frame on the roof so the vent is raised and some stiffener added.

Here I have the dolly..  taken apart and mounted to the underside..  Mounted only through the holes for bolting the frame.. NO new holes !  When it’s time to put the body back on the frame. I just lift it and remove the four lag bolts and the wheels will fall away..

Now for the body work…   Onward to PAGE 5

1982 Chevy Frontier Class B

1982 frontier Class B Wide body

Frontier Class B Wide Body Van Conversion, Model XL820

Here it is!  It’s not new.. and could use a bit of love.  I’ve only had it for a day or two..  The love will have to come next spring, it’s getting late in the season..  And please remember we are 38 years old..  A senior citizen in the world of RV’s. So you have to excuse the rust.. and the retro decals.

Frontier Van

Where do I start…..  Not expensive  I bought it with cash.. And yes this will mean we have two RV’s..  But this one has a hitch and I can tow my ATV… or a boat… or anything..  It’s very compact for all the stuff it has… 21 ft from the front of that cow catcher to the back of the bumper.  It’s like a LeSharo that you can actually use / drive..   With a real motor !  In fact we had a heart transplant 30,000 kms ago..  With lot’s of new parts..  It now has new tires too.  and drives great

And here’s the door !  Different !  but it’s a design that works… I like it. The Frontier was made in the Vanguard factory Winfield, BC..  And you will see more of the Vanguard version on the roads ..   Rare yes..  They only made these for a few years before the recession hit the RV industry.  It’s hard to find any info on the web for these…  That will all change with this post.

Here’s the interior.. very typical color scheme for the year BROWN !  The fridge has been replaced..  and the lino is newer..  but the rest is original..  And all in working order..  Just needs a good cleaning..

The floor steps a bit lower in the rear of the camper.. and that’s where you find a small kitchen and a wet bath on the drivers side. There’s a extra counter top you can lift up if you need it.  No oven .. no microwave..   Who uses those things when camping anyway ?  We cook outside.  BUT you do make coffee inside in the morning.

Here’s the biffy..  Works for me.. I’m not likely to use anything but the toilet. But you never say never. It’s very clean ..so nothing to do but change the light to LED.

So lets talk about the Van part of this camper.

That’s typical motor home fair ….  except !!  just a 350 motor.  Yup it’s the tried and true good old 350…  but this is duely  ..so heavy duty trans…  and stuff.  And like I said earlier… new motor 30,000 kms ago.. Work done  in Ontario !  It’s been places for sure… This summer it drove out to Sask and back with no issues.  And it just passed a BC inspection.

Look at the interior … it’s almost perfect..  I have not cleaned any of it..   Power locks , power windows, A/C that works..  cruise control, new stereo..  You know I’ll add to that list..  I’m thinking remote locks.. more power plugs…  back up camera…a digital volt meter for battery condition.. just to start..

Nov 17 th 2019:

Today I gathered up some ambition and plugged the Camper in to my 30 amp.  Everything works as it should..  But the extra furnace is  a bus heater that works from the motor heat. And I think works using the wall thermostat.  For sure it powers up when the van is running.    The RV propane furnace works great..  As expected the new 2 way fridge works..  I found the pump and water tank under the sofa..  Tank is empty and there is antifreeze in the water lines…  But just to be sure I ran another jug through…. No problems.  No leaks ! It’s all good and it’s time to put the Frontier away for the winter.

The tarp is extra insurance.  Not really needed but what the hey..  I feel better with it on cause I did not install the vent covers..  One or both of the vents will be replaced in the spring with better quality ones.. The current ones have plastic frames. And I’m thinking a power vent will be a good thing to install.   The Frontier (like most) is wired for a rooftop A/C unit..  I have one, but I don’t think it’s needed.  Going to find out this coming summer.

I’m going through all my collection of stuff for RV’s, And making a war chest for the Frontier for next spring..  Here’s some of the stuff:

What do ya know I have the remote locking stuff…  with two fobs!  I have lots of LED lights , switches, USB charge ports, and a host of other goodies to make life easier while camping.

I’ve had the motor antifreeze beefed up and checked..  Last thing I want is for that to freeze over the winter.  As soon as I get my new GoPro camera I’ll be posting some videos… if we are not buried in snow.  But first one made with the old camera….

And it looks good..  I expect the new GoPro to be even better.  There’s a screen on the back so stuff won’t be missing from the shot.

We were thinking about the sleeping arrangements ..  So I went out and pulled the sofa into the bed.  Not big enough for two.. so the dinette will be used as well.. and what do you know!  There’s room to walk between.. nice  The spare tire was blown… really bad..  So I have a new tire coming.. and because the other six are new this year too.. it will be a perfect match.

Now I have a rim with no tire… And you betcha I got to paint it..  One hubcap is missing …and I’m not crazy about them.. Kinda feel like I would loose more over time…  So I’ll paint the rims instead.

And NOT RV white !  This is my concoction I mixed up..  Half Aluminum half grey… and a dash of black.  Nice!  This is the only wheel I can paint this year..  The others will get this treatment next spring… And here it is with the new tire installed.

And that’s all till spring when the time is right for fixin up…

1982 Frontier Class B+  Page 2