November 30 2014:
Cleaning & Repairing…
Today I took the frame and axles to the wash bay and degreased them.. nice and clean now.. makes it a bit easier to finish taking them apart. Did not clean the tub..because I’ve decided to replace most of the bottom of the tub. Front and back too.. Just too many holes and thin beat-up metal.. So I’ve ordered a 4×8 sheet of 16 gauge steel. this is a bit thicker than the factory 18 Gauge of the tub.. I used this same steel to make a hood for the Kubota F2400 mower that I restored. Got to bend it with a torch because it’s too thick to use the bender. But it will be easier to weld than the 18 gauge.

Holes like this will be gone.. the 16 gauge will take more beating on the bottom than the thinner stuff.

Here it is.. nice and new , no rust.. I use the jig saw with a fine tooth metal blade.. makes a nice cut.
Well it’s more of a bump.. and it hangs down under the body, one front one rear.. This is where the chain sprockets live.. and this is the rear one and it’s in good shape so I’ll save it. The front one needs a rebuild… is full of holes.

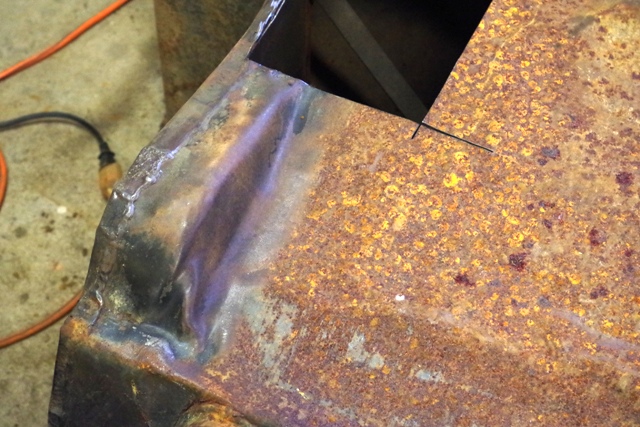
This is the rear of the bottom.. and under the striker is the place to cut out for the rear bump. We have also bent a 1″ lip to the correct angle for the rear piece to weld to.

Now you can see what I’m up to… and how much of the bottom I’m replacing. Lots ! I need to weld as much as I can then flip the tub over and cut out the “unneeded ” old metal. That will take some patience.. I did not want to remove much of the old bottom so as to keep the form & dimensions. When the tub sits flat on the floor “like in the photo” the shape will be intact too. From the factory the tub was in just two pieces, and a press was used to put those bumps in for the chain runs.. And other bends too.. Can’t work that way ..so we’ll now have three pieces, and my front bump out will be welded.

The Bottom is 90 % welded in place now .. And I’ve cut away what was left of the rear..

Here’s the new rear panel next to what’s left of the old one. Quite a difference ! I may be going through this process a second time with the other Terra Jet. As tough as these Jet’s are.. this is one weakness. 18 gauge steel is just too thin. 16 gauge is not very much heavier, but I feel it will take more beating before failing. Another weakness is those aluminum bearing hubs.. We actually got the one out of the front left housing INTACT. ! Wow.

Here’s the new panel for the rear of the Jet.. all welded up.. just needs grinding.

Here’s one ..the rear one .. of the axles holes for the tub. The hole is six inches round so you can get the chain sprockets inside. Then a cover plate goes on with the bearing holders. If you look back you will see that these only on the chain side are bent & beat up.. Welding new pieces with smooth new metal will make the seal work better.

And speaking of seals & bearings… Above you see I have only two good holders.. Both the rear axle holders were cracked. I would like to replace these with machined steel holders and four new bearings and new seals too. It just don’t make sense to have heavy 1-1/4 ” axles… nice big bearings and put it all in a wimpy aluminum holder. ?
Dec 15 th 2014:
Meanwhile back at the Tub…. I put the frame back into the tub so I could line up the new mounting plates. Then I removed the frame and flipped the tub back on it’s side.

Here’s the rear one all welded. I’m not the best welder. it’s a bit messy.. but the whole tub will have a thick coat of black paint… And most of where I welded would not be seen unless you look under the Jet.

A bit of fancy bending needed here… and some trimming too. This part of the tub gets sandwiched between the inner frame and the hubs that hold the bearings.. I will make thin rubber gaskets instead of just using silicone.
Also today I went to the auto parts store with my one good bearing.. and they had the perfect match.. So I bought three more. They did not have a seal that matched .. sigh. So I’ll be looking for those.
Got the front all welded now.
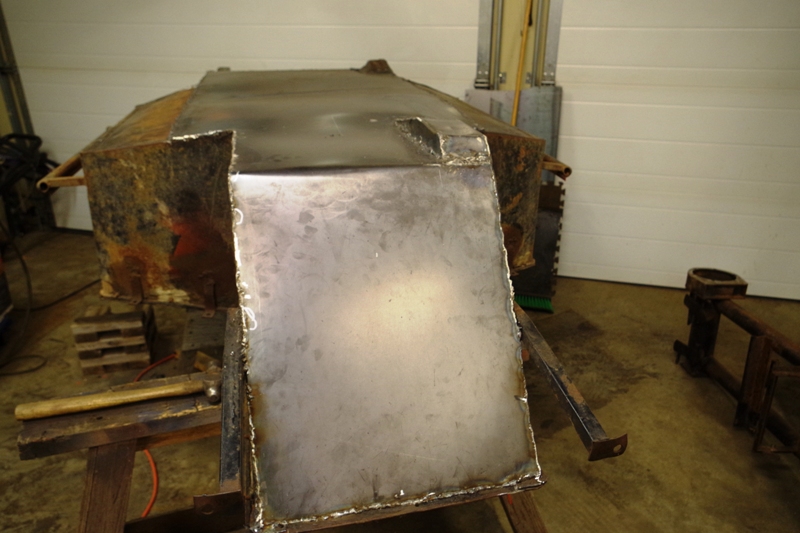
Getting closer to finishing the tub.. just a bit more welding and a lot of grinding.. and cleaning. I’m considering using truck box liner paint.. it’s thick and tough. So Here’s a Video of where I’m at with the tub and stuff.. Got a GoPro for Xmas..
It’s a so so Video.. My first attempt.. I’ll do better.
December 27 2014:
Christmas is over and I have more time to get back at the Terra Jet. I got all the welding finished now .. No holes that I can see. Everything is all cleaned up.. and today I ran urethane caulking around the inside of the tub.. And I gave the tub a coat of grey paint.

Grey ! I thought that I would try something different that the back. And I had a can left over from another project. Keep in mind that this Terra Jet is my learning one.. When I get to fixing up the second Jet I’ll know what works..and what I like.

Like this … Box liner coating for trucks.. It’s a two part epoxy thick coating.. much like tar..but hard. and very durable. I’m hoping the this is the ultimate coating for the bottom of the tub.. When they do truck boxes with this stuff and seal all the cracks.. the box holds water.. for months ! so if the opposite is true ..than this tub with never leak through my crappy welds.

However if your wanting a smooth surface this is not the stuff.


And with these photos the tub is 100 % done…. now to start the frame on a new page…
PAGE 3 ( the frame).