Cuz that’s the way I roll ! Pun intended. I’m cleaning up the shop and the trailer so as to not have any dust. Here’s a last look at the Surfside before the primer goes on.
Time to mask the belly band and the fridge vents. Two coats of primer comin up..
The Supplies ! Couldn’t get the off white in gallons so we have four cans. While I was preparing the door for painting I noticed the two halves were coming apart..
So I mixed up some resin and clamped it tight. I hope this works. Yes it did.. all better.. And here is a video update:
The first coat of primer is on and our trailer is looking “Whitish”.
Lots of defects disappear even with just the first coat. Once it’s cured overnight, I’ll inspect for touch ups and then the second coat of primer. And when that’s cured I sand the whole trailer.
And now we are very shiny and a slight off white. Needs a scuff and the second coat. I’m thinking about a black line below the belly band.
The door looks good ! Need to paint the other side though. Well now the trailer body is all done. And looks great.
Black & white is the theme for the exterior. So I’m painting the fridge vents all black. They are cream color right now.. so need a change. I’m proposing a 2″ black band just below the belly band. To break things up a bit without getting too crazy.
Ya… That looks better. And here’s a peak at how the vent frame turned out’
That should do the trick.. I’ve got almost two inches of thickness to screw the vent to. On to the interior now, here’s the link:
And that thing is the cabinets. Technically not part of the body. But they are in the way of patching and cutting holes in the body. Also it’s way easier to paint the roof and walls. Plus dealing with the floor is also easier. So let’s get to it. Fridge first. The little guy came right out.
I’m thinking of plugging this in to see if the heater works and maybe it will cool down. Or not ! I really have no need for this 3 way fridge. It really wasn’t hard removing the cabinets. So long as you know that the fridge and the closet cabinets are glassed to the wall. My oscillating tool with a saw blade fixes that.
The flooring was already removed. so it looks gross. I need to replace some of the floor on the outside edges. And also remove the Ensolite from where it will be inside the rear under seat cabinets.
The front cabinets can keep the Ensolite finish. The corner beside the fridge cabinet will be for electrical stuff, so access is through the top hatch. But the rear seat compartments now have outside hatches.
This will be nice to have… both sides. I’ve got all the holes cut, tail lights too.
Now I have the pieces to patch the holes I don’t want. And here’s how that happens. Wait for it to cure and then take the screws out and finish glassing the patch. While waiting for that I started to remove the windows. Darn ! Someone used silicone to glue the windows in place ! And the rear window leaked anyway. Nope you must use butyl putty tape when installing things like windows.
And so since I took the windows out and have to deal with the silicone… I may as well do all the body work on the sides of the trailer. Fill, sand, fill, sand you get it.. This is the result , when the primer goes on this will look nice. The red is touch up spot filler.
Then it’s up to the roof where I need to deal with the vent. And this is what I’m up against on the roof. The damage to the gel coat is worse up here.
Good thing I bought another can of body filler. The other side is bad too. This was where the awning strip was. I will not be putting it back.
Here’s the plywood bezel for the roof vent. Why plywood ? Because it won’t crack when screwing into it. It’s also one piece. This is something I did with two of the other trailers.. for several reasons which are obvious to me. Raises up the vent, provides a good attachment , adds sturdiness to the roof. Notice the fiberglass repair on the right corner of the vent. Ya.. this will not happen again.
You can never have enough clamps ! I’ve glued the bezel to the roof with resin and fiber mat. Once that was cured I attached the inside trim with screws down from the top.
This will be painted at the same time as the interior. Now the roof is way stronger and will easily hold the extra weight of the Maxx fan. Also the maxx fans interior trim has a place to mount.
Then I started the process of glassing in the raised mounting bezel to make it a part of the roof. Once that is cured and sanded smooth it’s time to clean up and wash the trailer for the paint..
The belly of the beast is first up.. There is some cleaning and fixing under there before the frame goes back. Deciding what to do as I go.. One thing for sure is the black gravel guard on the lower front of the body. Here’s a photo example of the under side damage that needs fixing.
This is the right front looking back. You can see the curve of the frame. And the frame has rubbed through in a few places. There also visible is the holes where the propane lines went through. All of this needs fixing … and further back if you look there is a nail sticking through. I saw more of that at the rear of the trailer. Nails ! really ! When I’m done the only holes will be for the bolts holding the body to the frame. I’m really acquainted with the under side of the trailer. Still working under there and using my creeper to get around. And working from front to back.. Also while I’m mixing filler I’m fixing some small holes and gouges. Today I finished the front and sprayed the gravel guard on.
Some of this will be hiding behind the box. The amount of rock chips on the front corners was huge. Hopefully this will help. I sprayed right under the front up to first cross frame and two of the hold down bolt holes. The rest of the under side will get the precoat primer.
DONE. Repaired , holes filled, sanded and cleaned. Just one coat for now , second after the body work is done. This is more than I did for the 76 Surfside. I filled the holes but that was all.
I did paint the wheel wells too. Why not, they were handy. Yup there’s the creeper.. Rolling around under there while painting was a challenge, trying not to touch the wet paint. Next the frame goes back under.
Done ! I work alone doing this.. I used small moving dollies under the rear bumper combined with my Floor jack to move the frame under the trailer. Then I lift the frame up and put jack stands under the frame. Lower the body down one end at a time. Line up the bolt holes and there you have it.
And if the frame and body look like this … you win. Oh one more thing to mention. I put truck canopy foam tape on the top of the frame. This should help with the rubbing of the body on the frame.
Couldn’t resist placing the box on the tongue to see the fit and the look. Yup that works good.. So now that I have room on my lift table , it’s time to remove the cabinets. New post for that.
Well I’m currently working on my fourth trailer. Not a flat deck, but a small fiberglass travel trailer. They’ve all been old, forty plus years old. With varying degrees of hurt. And in need of work. Very few wood and aluminum trailers survive as well as these little guys do. Rough roads as well as mother nature are hard on wood framed trailers. I know I’ve seen them all. Moisture and wood BAD, especially when the moisture can’t escape through the exterior cladding. Which is there to keep the water out in the first place. But seals around windows and vents can leak. Some fiberglass trailers have wood framing inside, and those can be problems too if a leak happens. Bigfoot’s, Venture’s and Beachcomber’s come to mind. There may be others too. Boler’s , Scamp’s, Surfside’s and Trillium’s have a foam backed vinyl finish called “ensolite” on the roof and walls. This does not care about water.. And you can paint it when it starts looking shabby. The new Trillium trailer called an Outback uses a marine carpet and foam finish on the inside. It’s water proof too but could show stains, and you defiantly can’t paint it. I’m not sure how some of the other newer offerings are finished inside, so I can’t speak to those. Now I would like to talk about the pros and cons on the trailer’s that I have personal experience with.. Links to the posts are green.
This was my first dive into the world of fiberglass “eggs” as they are called. These are the true survivors. There is more of these out there fixed up and on the roads then the others. At least here in Canada. These were made here and we love’um. Just look at the price folks are asking for them .. They are cute, and you can tow them with most cars. Hot rob guys love them too.. they just look cool behind a classic car. So here’s my thoughts:
Pro’s : I just named some above. And there are certainly more pros than cons. Here is other good things. The cabinets are molded fiberglass too. they look great and easy to clean. Those cabinets help to support the roof by design. Those cabinets help to make the trailer very light and tow nice. Easy to work on and customize. And one thing I noted.. the floor is molded fiberglass with a plywood core.. So unless you drill holes though it and don’t protect the holes they last for ever.
Con’s : The frames.. They were built very light and need the floor to help with their strength. That would have been ok if they bolted the two together.. But they did not, wood screws were used, and they rusted. The frame would then sag in the rear.. You must build a new stronger frame and bolt it to the body. The cabinets can only be slightly modified. The door is hard to fit good.. but it can be done. And part of that is the very inadequate square tube on the hinge side to help keep the door frame in line. Also I’m not a fan of the way the body extends below the floor to be a sort of skirt.. It’s cosmetic and can be damaged easily.
Trailer number two.. These are the American made Boler. Same basic body shape. Lot’s of these down yonder.. And this one came from Arizona. And if it stayed there maybe the floor would still be good.. These had an unprotected plywood floor. So on the coast of BC it rotted out. Because the floor was only fiber glassed around the edges.. The 3/4 plywood just fell apart . I got it cheap because this was an overwhelming job for most. And I had to trailer it home 9 hrs away .
Pro’s : All the same as the Boler except for the floor.. BUT the frame is a little bit better on these.. And I was able to keep it and just do a few repairs and mods.
Con’s : That unprotected floor is not good. A new floor was needed and not easy to do. The skirt around the bottom was cracked in many places. Again the frame is poorly made. All the thin metal was rusted away.
Made in Winnipeg MB. Bigger is better ! This body is still used today by Trillium, with a few small changes. I’m not sure who was the first , but there was some legal issues. Surfside’s were made for approximately six years. Not sure about the Trillium’s. There’s no doubt to me that this is the best body design for a small light weight fiberglass trailer. It’s a foot longer and 6 inches wider than a Boler. May not sound like much, but that makes the bed longer and wider. The kitchen is bigger with more storage. These things should be in the Pro’s…
Pro’s : All those things I just mentioned.. plus the frame is stronger. The axle is bolted on and so is the body. There is a molded frame around the door to keep the opening stiff. The lower half of the body wraps under the trailer making this a true two piece body. The floor is glued to the inside and flat all the way to the front. Moisture can escape through small holes in the molded in gutters around the perimeter of the trailer. Cabinets are not bolted or riveted through the body.
Con’s : The cabinets are wood. not a big deal , and they lend themselves to modifications. The roof still needs to be supported by the cabinets.
If you want to tow…You need confidence in the frame, axle and wheels. New stuff should work for that.
How do I stress the importance of worry free towing and safety. The first thing always is start from the foundation. And because I believe this axe is old and wore out, we are ordering a new one …Not cheap but very important. So I will pull the frame out and replace the axle and modify the rear bumper…and some things on the tongue. Plus of coarse a new coat of paint.
So here we go ..
Sure is nice to do this on a concrete floor and not a gravel driveway. And look I have room for both the frame and the body. Took me about an hour to get to this stage. I was working alone and thinking carefully about each step.
I’ll take the wheels off and lift the frame up where it’s a comfortable height. Next step is to measure the axle for ordering a new one.. Interestingly the tag on the old axle is still legible. It says 1500 lb made by Ingersoll.. Called a Rub-R- Ride. Too funny. It’s now a wore out ride. New axle is ordered , and I’m sourcing a rear bumper. I now have the box for the front of the trailer.
That’s a good size, should hold all the goodies I want. Time to clean up the frame.. Plus I’m doing some of the body too. Here’s the latest Video..
Picking up the axle tomorrow. Just need a rear bumper and I have all the bits for the frame. Removing the old hitch was not fun.. Welded very good. Hopefully I can do as well.. I will be bolting it on as extra precaution.. I like a good back up.
It’s here ! new custom made axle. adjustable ride height, EZE lube bearings and new E brakes. I also got a six foot piece of square tube for the bumper. Now I have every thing needed to finish the frame. A good place to start is to paint the new axle. It was just bare steel and would rust quickly.
Next up the coupler / hitch… whatever you want to call it. I’m bolting it and welding it .. That should be double good. The one big nut you see will also hold the safety chain.
I got the new rear bumper tacked in place, with extra braces to keep things straight
I’ll finish up the welds tomorrow.
It’s tomorrow ! I finished up the dirty work and cleaned up everything. Got the bottom of the frame painted. And once it’s good and dry I flip it and finish up the top side.
The axle will go on too. Flipped the frame over, and finished up the last of the welding. And now with a fresh coat of paint it’s looking good.
All the modifications are done. Once the paint is cured good I’ll get the axle bolted back in place. It’s great that I could use that coupler I had stashed in a box of hitches and stuff.
A newer safety chain is installed now, and the bolts are ready for the new jack. That tray could hold a propane tank, Or the battery. I just need room for my 7 way junction box.
The 3 x 3 bumper turned out good.. even closed in the ends. This is thicker metal than the rest of the frame… so it should hold the spare tire without any problems. Possibility survive a bump or two.
I even made a new License plate holder. And an update video.
One thing this video shows is the new axle installed and the brake wires routed to the front. It’s always the best part when you are putting things back together. Once the wheels and the jack are back on the frame is ready to go back under the trailer.
Just a quick photo of the cleaned up tires. I believe these are only a year old. No Cracking , No Air loss, and they are radial. good to go!
Also a quick photo of the new jack installed. I like these because the handle folds out of the way. Now it’s time for work on the body.. First there’s some work to do to the under side. That will be in a new post
OK let’s start off with this video… Warning it’s longer then my usual video’s.
I talk too much ! But there is a lot of info in there … bound to answer some questions. Musta worked cause I got a lot of views. Helped me think too. I’ve got a good idea where to start. But first let’s have a look at some things that are interesting and some need work. These are now my photos..
The tongue: I almost never like the way this part is set up. To start with there’s a rock guard ! And it doesn’t work very good. The front of the trailer is covered with dings. So this has got to go . I’ll just cut the ends off, the middle part will help hold the tongue box. My plan is to gravel guard the front of the trailer, plus I will be installing a tongue box here for a diesel heater (more on that later). Also could use a bit more tongue weight so the batteries will find room here too. The 2 inch hitch is loose on the ball, to be expected after 47 years. I found a new one in my stash …with a new jack too.
This will increase the safety of towing.
Door Hinges: These are different from the 76 ones but are still stainless steel other wise they would be rusty like the screws. Lower one has a loose pin. I’ve ordered the same ones I used on the 76 again. The door does work good, but I’ll still change out these and the screws. Oh ya.. look at this below…
A Bargman door latch ! Yes the highly sought after door latch.. No key but that’s an easy fix. And this one works great and looks great..SCORE !! ( update… I found a key that works !!)
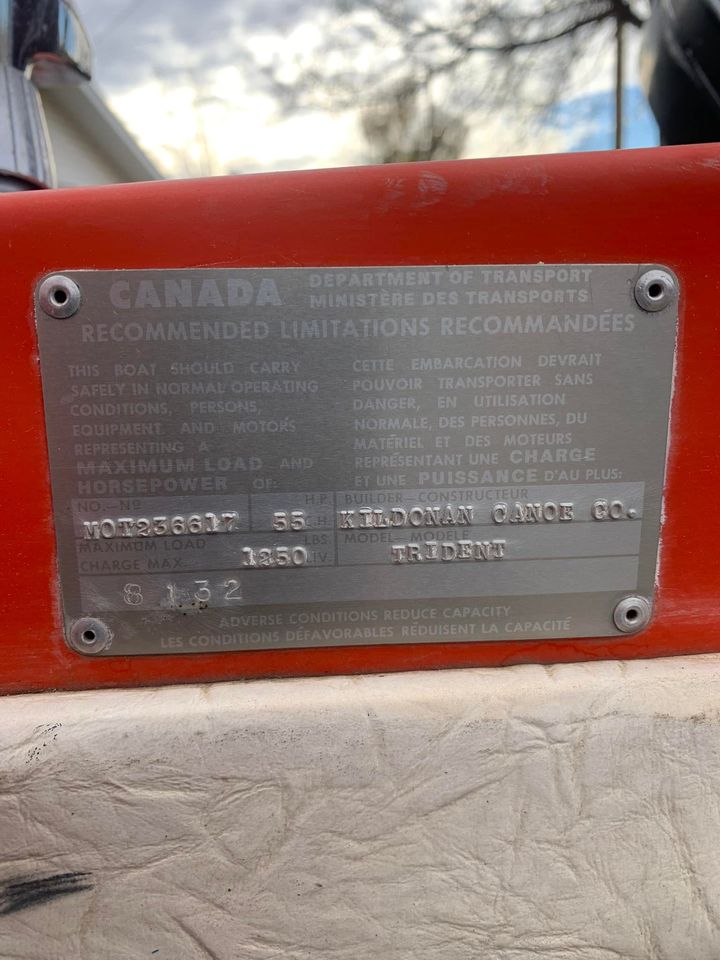
Look the factory tag ! This is a clear indication that the gel coat is original. Another indication is…
The decals on the lower part of the trailer are all there. some are looking rough so you know they are 47 years old. I have the vinyl and the CIRCUT to make new decals.. Oddly they’re are no decals on the upper half of the trailer ?
Good thing because the top of the trailer is showing signs of the 47 years for sure. There is a few places like this that will need to be fixed. That means a new paint job. So the work begins with a much needed bath ( because I got it dirty) after removing the lights ( Don’t need them clean). Other little bits , and what’s left of the propane lines. Plus anything else that stops the frame from parting ways with the body.
Like these four bolts ! Hey wait a sec.. There should be six holding the body to the frame. Double checked and I did not see any more. It’s quite clean under the trailer, and these are good bolts. So someone has been here before. Well we will fix that when I put things back together. But this is still a take-apart stage.. And I’m tossing as I go..
This is what I think of old , brittle lights.. Not on my trailer.. LEDs all the way. Here’s an update on the progress.
Need to buy some timbers to hold up the body so I can pull the frame out. And when that’s done I’ll start a new page for the FRAME..
OH ya I’m gunna do it again.. bought another small fiberglass trailer.. another Surfside.
Ok here’s your typical Tripple E Surfside trailer photo from the big wide web.
Yup that’s nice.. But here’s What I found for sale (and now own).. Followed me home. And got dirty.
Hey wait a minute ! That’s not my usual fixer upper ?
Well that’s cause I paid more for it..But not too too much.. When I was looking there were no collapsing to the ground trailers… Or everything painted green ones out there. All gone ! So I have to settle for “better” stuff. I know…it’s a change I will just have to put up with.. And this brings up the dilemma of ..what to work on and what to leave alone. Sigh.. Oh well we’ll get to that. I’m hoping to swap the boat for the Surfside in the garage , let it thaw out and get down to answering that.
OK how bout a few photos taken by the fella who sold it to me. I haven’t had time to take my own yet !
The Exterior of the trailer is in great condition.. Nothing broken or missing.. No obvious damage. But I’ve only spent about 30 min walking around looking things over. So I’m sure to find stuff that’s not right.
All the lights are there intact, but the wiring for them needs a look. He already had the tow lights installed. So rather than fiddle around it was just plug those in to get the trailer back home. The roof vent ,the fridge and furnace vents are good. All those ports for water and power still work. BTW those are hub caps on the 13 ” wheels. I like them ..but they could use new paint.
What’s the inside like ? Well the best way to describe it is ” 90% there but modified” Newer good cushions ! Faded denim curtains. However no table, no sink, no water system at all! Also missing : the stove, The12 volt wiring and no 12 volt lights ! The furnace is gone too, which I’m happy about that.
What is there ? Well the oldest little fridge I’ve seen yet. It would be a shock if it worked ! The cabinets are still good. I say that loosely because there are some modifications that won’t work for me. But it’s better than not having the cabinets !
Not sure what’s going on here? Some kind of storage. Interesting light fixture ! It’s the only light. And the final photo I’ll show you…
The closet ! It’s great and the builder’s tag is still inside.
I’m not going to miss the stuff that isn’t there. someone just saved me the trouble of tossing it . But the stuff that IS there will save me a lot of work. And in some cases ( like the cushions) a lot of money. They cost about $1500. to have made. Once I park it in the garage and let it thaw out.. We will take inventory of things and more details. Plus some videos. More on ..
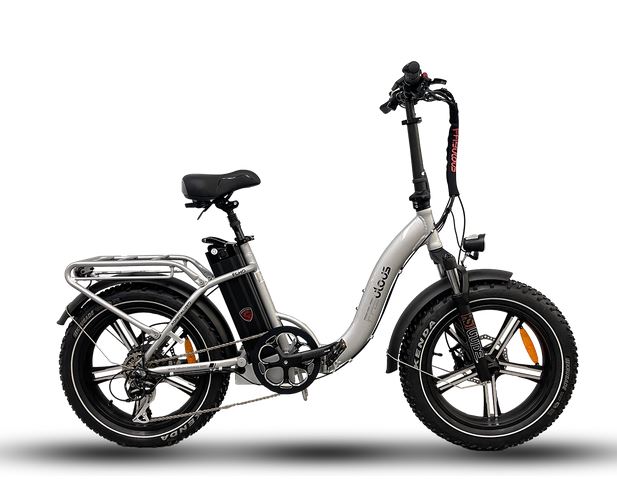
Only slight differences.. But every bit as good. Right out of the box.
No problems with the packing.. So I made an “unboxing” video..
I made this video to show how little there is to do setting up the bike. Most of the work was taking the protective wrapping off. Not long after that I went for a ride just to make sure everything was okay.
And then my final thoughts on the bike.
I think this step through frame is the best bike for old folks like us.. Very user friendly. For those of us who are not in the best of shape… E bikes are what should get you out and getting some exercise. I say some.. because if you want you can let the motor do all the work.. your choice. If you get the chance to try one you will know what I’m saying. For now it’s full on winter here and even if the roads get bare again it’s still cold. So for now we will put the bikes away till spring.
April 2023: The bikes have been stored in the basement since the Echo arrived. I have now cleaned a place for them in the garage so we can start using them again. Only once during the winter did I charge up the batteries.. and they did not need much. We had full charges yesterday when I brought them to the garage. It was a nice warm afternoon so I just had to go for a ride. Just WOW!
Folding fat tire bike.. Charged up the bike and the GOPRO.. and this is what you get.
I made three short videos for the bike. This is the first… Next is…
And then my final thoughts..
Any more will be rides or the adding of some goodies.. However after I made the third video the temperature outside got to + 2 c. So why not go for a second ride. No video. This time I went down our road to the highway and across to the paved trail. The trail was plowed and mostly bare. The bike is great.. If it warms up again I will not hesitate to go riding in the winter.. but I can’t wait for the nicer weather and more trails are open.
I put all three videos together in one..
The next post will be the second E Bike for Maureen.. But it will also take two weeks to come. In the meantime I went for more rides when the weather warmed up.. I even rode all the way to the downtown. I’ve got 20 kms on the bike and the battery still says full. But the cold weather is coming back …So I put the bike in the basement for the winter. Here’s the link to the second bike..
We live in a trail rich area here in the Drumheller valley. It’s bike friendly for sure. Many kilometers of paved pathways through town and out to the burbs. And they are adding more due to the deal with CNR for the old rail grade through town. Already a section east from downtown has been paved, with plans to take it further. Hopefully this will include the train bridge over the river just west of town. It has been blocked off since the rails were taken up. I’m talking about this because we really could use more activities to keep us healthy. Accessing these trails are just two blocks down the street from us. That puts us close to a great activity that does not involve driving. We have two peddle bikes already , good ones that haven’t been used in many years. But it’s not as flat out here as you would think, so they may be more work then we want.
This is the answer..
A folding E bike ! Why folding? Our new house lacks the storage we had before the move. And the fold up ones need less space. Plus we won’t need a bike rack to take these along on a trip. These bikes are fully equipped with powerful motors and large batteries with lot’s of range. The photo above is the exact model I have ordered. I will of coarse have better photos when this… the first one arrives.. Yes first one if we like what we see then we will order a second one.. But we are thinking maybe a step through frame. Like the one below !
You can see the difference. On this bike the seat post has the suspension.
While I wait for the bike I’m still researching E bikes. Most of them are out of the USA . The exchange rate is not good and add to that cost of shipping. Even very few of the Canadian offerings are free shipping. So you must compare all costs. You also must compare the components used to build the bike. And not just the motors and batteries but the brakes, gears and the LCD screen for the controller and it’s ability to be configured. They just sent me the manual for the bike.. It blows me away how much I can change the bikes performance. Here’s the controller screen that comes with the bike I ordered.. Color !
There’s a lot more info on these than other bikes have.. You can also see maximum speed and average speed. And like I said it’s customizable . The 5 you see is the highest peddle assist level. This one is feature rich, or loaded as we say. And here’s an interesting fact that I believe true. Even a long time ago when I was selling bikes. Most bikes except for the very expensive custom ones are built in China.. Or at the least the frame is. Even brands you know well go to China and have their bikes built to their specifications. When the bikes get here the company may unpack the bike and add custom things.. or at least go over the bike so they can offer a warranty. But more often the bikes come shipped as you see them. There in the hundreds of offerings you will see the same frame being used. If you are shopping around you will notice that. So I will review the Fabulous bike carefully .
Update: The bike is coming on Monday.. So two weeks delivery time from Montreal.. That seams right..
It’s here ! Safe and not damaged. Time to unpack and still look it over carefully. Well it’s great and came with a few surprises. A bag for the rear rack.. And a really neat tool that fits all the nuts & bolts on the bike.
It’s Panniers ! Wow did not see that coming. The tool is great too. Comes with it’s own little pouch. Neat.
And they changed the left hand thumb throttle for a right hand twist throttle. I asked for that. Thanks I like that better. Here it is…
Without the battery,, that’s charging. I love it ! While the battery is charging I tweaked the handle bars and the stuff mounted on them to suit me.. I’m kinda fussy about my brake levers angled down a bit.
Time for a new page. Now that the bike is here. Page 2
After the boat is (hopefully ) off the trailer then I will start the little bit of work needed. Paint and wiring the lights.. but in the mean time I got a vin number assigned to the trailer..
New Vin #
There it is ! Now the trailer is legit and registered to me.
Update: May 2023… The other day I was outside and when I looked at the boat I thought it has to go. So i listed it and sold it that day. GONE ! I just don’t want a other project foe this year.. and it’s taking up space in out small yard.
Here we are in the shop …nice and warm.. all my tools.. Away we go. As I mentioned in the motor post ..one thing lead to another and I removed all the switches and the stereo, and the speakers. Cleaned up the rat’s nest that someone else did.. I’ll make my own. Now I was dying to see if something was hiding under the Government tag.
This tag.. Well there was nothing under it BUT when I removed the padded trim that you see below the tag.. There was the Hull number ! And it matches what is on the tag. Mystery Solved.. But I still don’t know the age of the boat. Darn.. I’ll probably find out when I register it. Now I’m making a plan. And that starts with removing everything from the dash.
What a mess ! This is going to take some planing.. I have a speedometer, steering wheel, tachometer and a switch panel to fit in this space. But not yet.. The overall plan is to strip the top of the boat of things that are easy to remove..like the snap buttons. This will make the polishing easier. What the heck.. Let’s strip the interior too. It needs new carpet and the seat bases are coming apart. Let’s give it a real good face lift. !
That’s better.. I’m keeping the fold-down seats.. But I will rebuild them.. I found a good deal on gray marine carpet in town, so this will look like new soon. Also I’m testing my abilities to remove the oxidization from the red gel-coat.
Not bad ..not great either.. Wet sanding then polish then wax. How fussy should I get ? I’m using an eraser wheel on the decals.. works great ! The oxidization is deep. So it’s hard to get all of it. Here’s the bow area that I’ve been working on..
The difference you see here is on the right side I used the orbital sander with 220 grit first. That made quite the difference in the final finish. Getting rid of more of the oxidization then hand sanding . I’m working on the bow because the snaps and the bow light will go back on and little to no change.
This is next ! But first an update video..
And the polishing continues… Also I received the coloring powder to use with resin and filler.. But the best I could do is pink.
Oh well I’m just filling holes like these above. Snaps and fittings for a top. Those tops are old school. I want to buy a bimi top .
This is going to be drawn out till spring. Because it’s too late in the year to run the motor other than briefly. And I’ll be working on the boat at the same time..
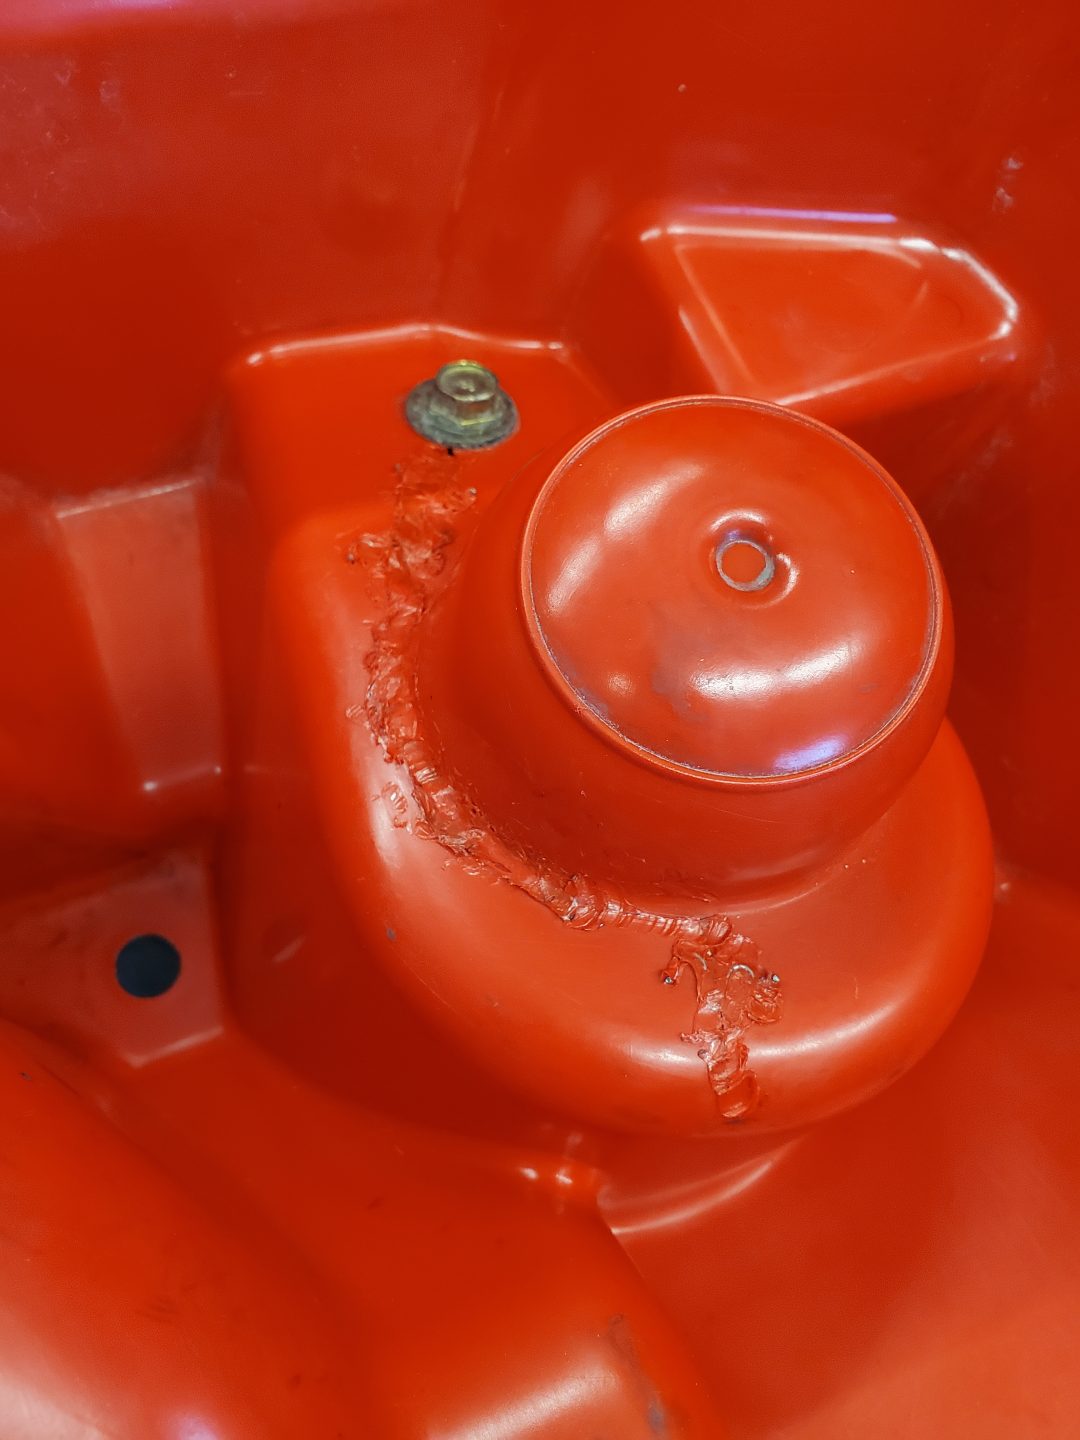
I did get most of the cowling off.. Can’t figure out the front piece. All I know is …it’s not seized. turns freely . No sign of anyone messing with it.. This is good… so far.. So I just wanted to see if the starter would work with the key. Nope. The key switch is broken. The wires are messy.
That got me removing the control from the side wall… which got me under the dash.. which got me ripping out all the wiring . I’ve ordered a new key switch cause there’s no fixing this one.. So without the key switch I tried to get the starter to kick over.. Nope.. Even with direct power.. ! now got to think about this. I ordered a new starter… They are not expensive so why mess with the old one..
Plus there is a lot of stuff to remove just to get to the starter.. Don’t want to be doing that too often. And then I can’t get the starter apart to clean it ..
It’s very seized up.. Sure hope I can remember how to put things back..
I couldn’t resist the price.. $550. Basically I bought a trailer and it came with a free boat and motor. And if you follow my blog and the posts you know I’ve seen and had a lot of free or cheap boats. And in most cases there isn’t much left that’s any good. Plus if your lucky and a motor comes with it ..it’s old and hasn’t run for a very long time. The motor we have here is not new.. It’s a bit more than 30 years young. However I’m optimistic .. And even though I don’t know much about it and neither did the guy selling it. It should run. There’s a story for him.. But that’s not mine to tell. Let’s just say he’s only had the boat for a few weeks …and that’s cause he wanted the trailer. Changed his mind and put it up for sale just to get the money back.
As for the boat… way to good to throw away. It must have been stored with a cover. Anytime you get an old fiberglass anything ..it’s covered with mold spots and needs a bath.. Not this boat.. Oh sure it’s sun faded.. but it’s 40+ years old.. Original gel coat finish.. a few chips ..but should polish up nicely.
The controls seem to work fine.. Even have the key !The seats have been re covered.. Nice
The carpet has seen better days, there’s a bit of green. However you can walk around without falling through the floor.. I like the red and gray theme.. But I don’t like the old cassette deck.. I’m doubting it still works. And I don’t care cause I don’t want a stereo.. would rather have a fish finder. Which brings me to the general wiring in the boat … Big thumbs down.. Typical rat’s nest of patched and taped up wires. That will need sorting out. I will make a video once the boat is in the shop.
And here it is… And I’m thinking a new post for each of the three parts of the project… Part 2 The Motor
OK I’m ready ! The best place to start is with some cleaning. So do I remove the plastics ? Or not worry about what’s under them. It’s not like I’m pressed for time.. However the time is coming soon where I will have to stop using the out side water..
I started with this part of the quad. Pretty much all of the electrical is here. And it was very dirty, so gave it a bath with the cyclone detail gun and a brush. That’s a genital way to clean. Now I can read the fuse bock words!
I removed the rear rack to better clean the fenders and fix the crack from the underside. I’ll take this kind of stuff outside for a date with the pressure washer. Carefully..
With the sticher I fixed the crack inside the trunk. There much better. Bath Time ! I only removed the rear rack and the winch cover. And I did use the outside water and my diluted purple power cleaner. Then I put the stitches on the under side of the crack on the rear rack. That takes care of all the plastic repair for now.
Wow it’s looking great..
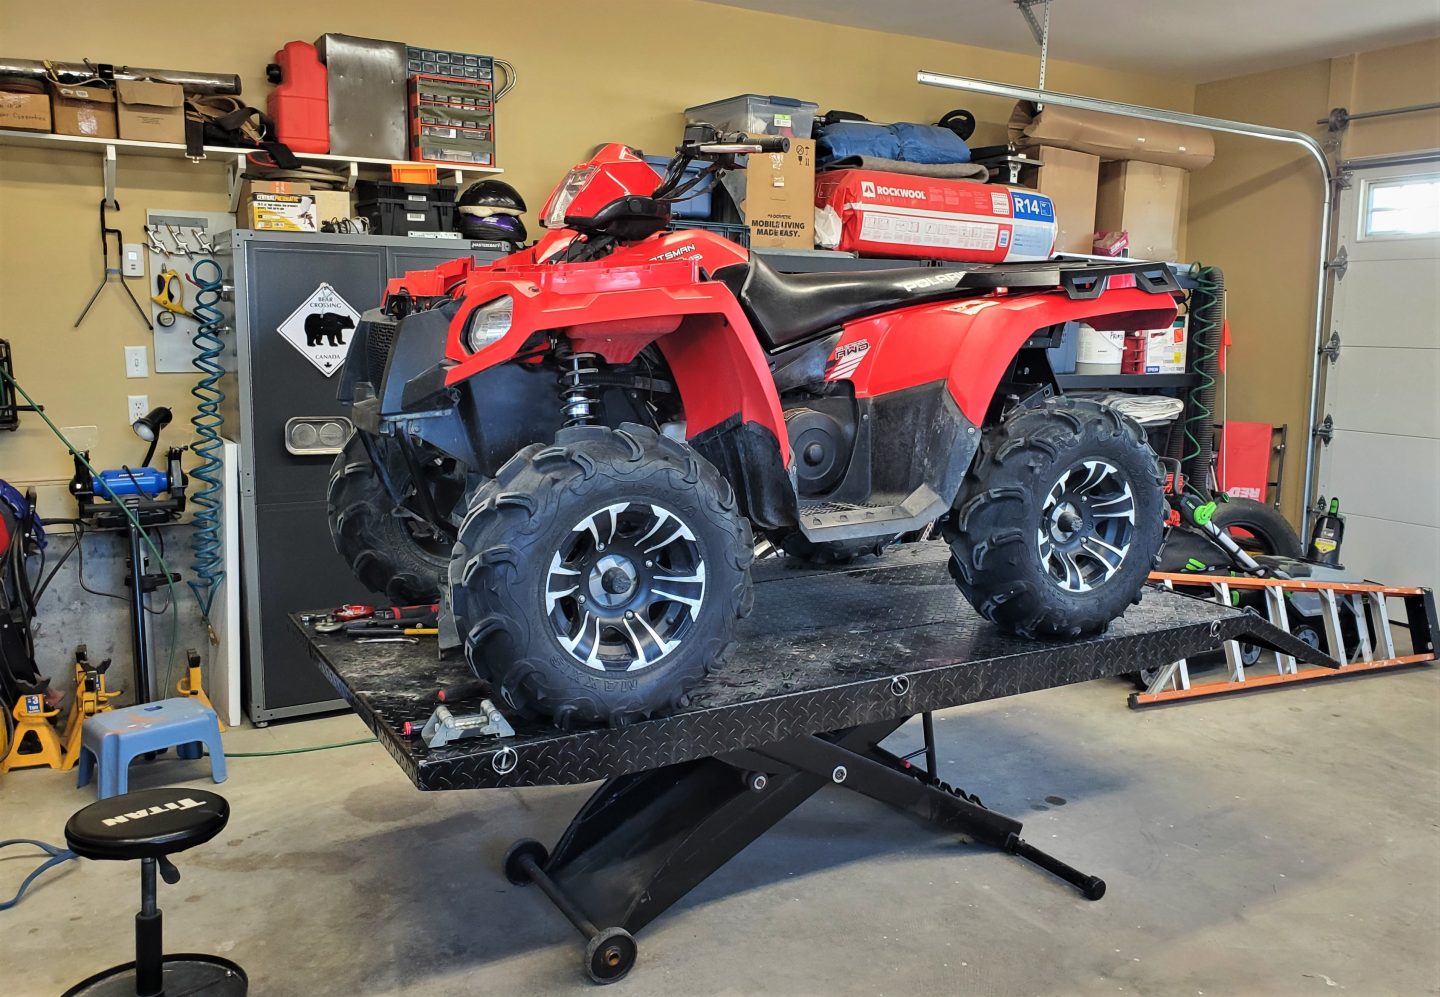
I just erased 9 years from this one.. I got a great deal. This is the way the quad will sit till all the bits and pieces come next week. How ever the winch rope came the next day.
Yup bright red.. easy to see. I had a new hook and a Warn rubber stop too. This rope is supposed to be good for 8000 lbs. The Polaris winch is a 2500 lb one and the ATV weighs less than 700 lbs. And I have used winches in the past… get high centered on a log in the snow …and you will be thankful you have one. So That’s why I’m fixing this one.
I had to remove the winch from the ATV. Put it in the vice and spray the old cable… Tug Tug to get it free. It was jammed in the spool… someone ran it in too far. any way I win.. Above is the new synthetic line , hook and rubber stop. What’s the checkerboard metal under the atv you say ?
It’s on the lift table ! I can roll around on my stool to do the work.. Nice…So I’ve been removing each wheel so I can better check the brake pads and the condition of the bearings and bushings.
New video… While we wait for parts.
Parts are here… now the winch works perfectly. I was cleaning the air filter box and discovered these cracks on the under side of the boot that goes to the carburetor.
no way can I fix this …and I’m not going to duct tape it either. New one ordered.
So it’s now spring 2023. The snow is all gone and the the weather is getting warm. I wish I had an indoor place for the Polaris… but I don’t. So it has been siting all winter since mid October with a cover.
And .. well that’s been just fine. A week ago on a very warm day I took the cover off. Just for a lark I gave it a little choke and it started right up. ! Wow ! Running just fine.. Needs an oil change ..so that’s next.
Update : So the poor quad has continued to sit there under the cover. No place to go… no place to ride.. I fired it up once to move the utility trailer ( seen behind the quad) and that’s it.. It’s August now and I’ve decided to list it for sale.. The plan is to use the money for something I will use. Thinking of a jeep TJ to do some exploring here in Alberta. We’ll see what happens..


 Wait for it to cure and then take the screws out and finish glassing the patch. While waiting for that I started to remove the windows. Darn ! Someone used silicone to glue the windows in place ! And the rear window leaked anyway. Nope you must use butyl putty tape when installing things like windows.