Made New Again !

I’ve been wanting to build another one of these. AND now I’ll be needing one.. I’m planing to change my quad for a side by side. And the only way to carry it properly is on a wider .. lower … trailer. If it tilts for loading.. then better yet.

This old trailer was out on the farm.. it’s free.. BUT.. the only part that’s good is the 6 x 8 ft. deck frame and the tilting lock. The old rear end from a car is toast.. And the hitch part is just not the way I would like it to be..

But I love this lock for the tilt. so I carefully cut it off.. The small hitch frame I will use latter for a yard wagon. Hear is a chance to use the axle and new 10″ wheels I have from the Colman Tent Trailer I took apart a year ago. At 64″ hub face to hub face it’s perfect.

So I carefully rebuilt it. And painted it.. The 10 inch wheels will be lower to the ground. And I have 2 new never used wheels and two good spares. I will need new springs, but i have all the other new bits… so the running gear will be new… Put aside and ready to install .

So time for a new frame. I bought new 2-1/2 ” box steel. Then welded an H shape that’s a bit wider than what you see above. The old frame and the front piece of angle were cut out.. ( in red) . That old frame was all bent up..and too tall.. that added extra height, which I did not want. And the front piece was also bent..

After new notches were cut in the two cross pieces the old deck and the new frame fit together nicely. I should mention that the new frame where the springs will mount to is the same as the wheel base on a RZR side by side. That means the weight is held on the strongest part of the deck.

This cross piece is where the trailer tongue will attach with a hinge for tilting the trailer. But I need to add a few more bits… two more cross supports , and some shims so the decking is level. One of the issues with this kind of trailer is … where do you put lights? Well they need to be tucked under the deck. Same with the license plate.

So I’ll be using these pieces I cut out for a different trailer and did not use. But they will work nicely.

And there ya go.. As well you can see the shim pieces tacked on top of the frame to level off for the wood deck. Time to flip the whole thing over..
UpSideDown !

Several things are happening here.. The welding is finished on the underside… and I’m working on the tongue. The hinge , latch and hitch are all done.. Even a rest hoop that doubles as a safety chain mount.

The latching mechanism has been resized and should work great.. spring loaded so when the deck comes down…click! Not sure if I’ll be happy with this.. will see.
Spring is Here !
Not really… Today I went to Kelowna for some supplies.. includes two new 3 leaf springs. Now I will know how much clearance the 10 inch wheels will have under the deck..

Well look at that.. I’m needing to ad 2 1/2 inch tube to the frame to give the tire 3 inches of clearance under the deck… So we’ll have to see what the tilt angle ends up being.. Ends up to be 28 degrees.
 I’ll need this left over piece cut in half… more welding.. Good thing I have the extra pieces.
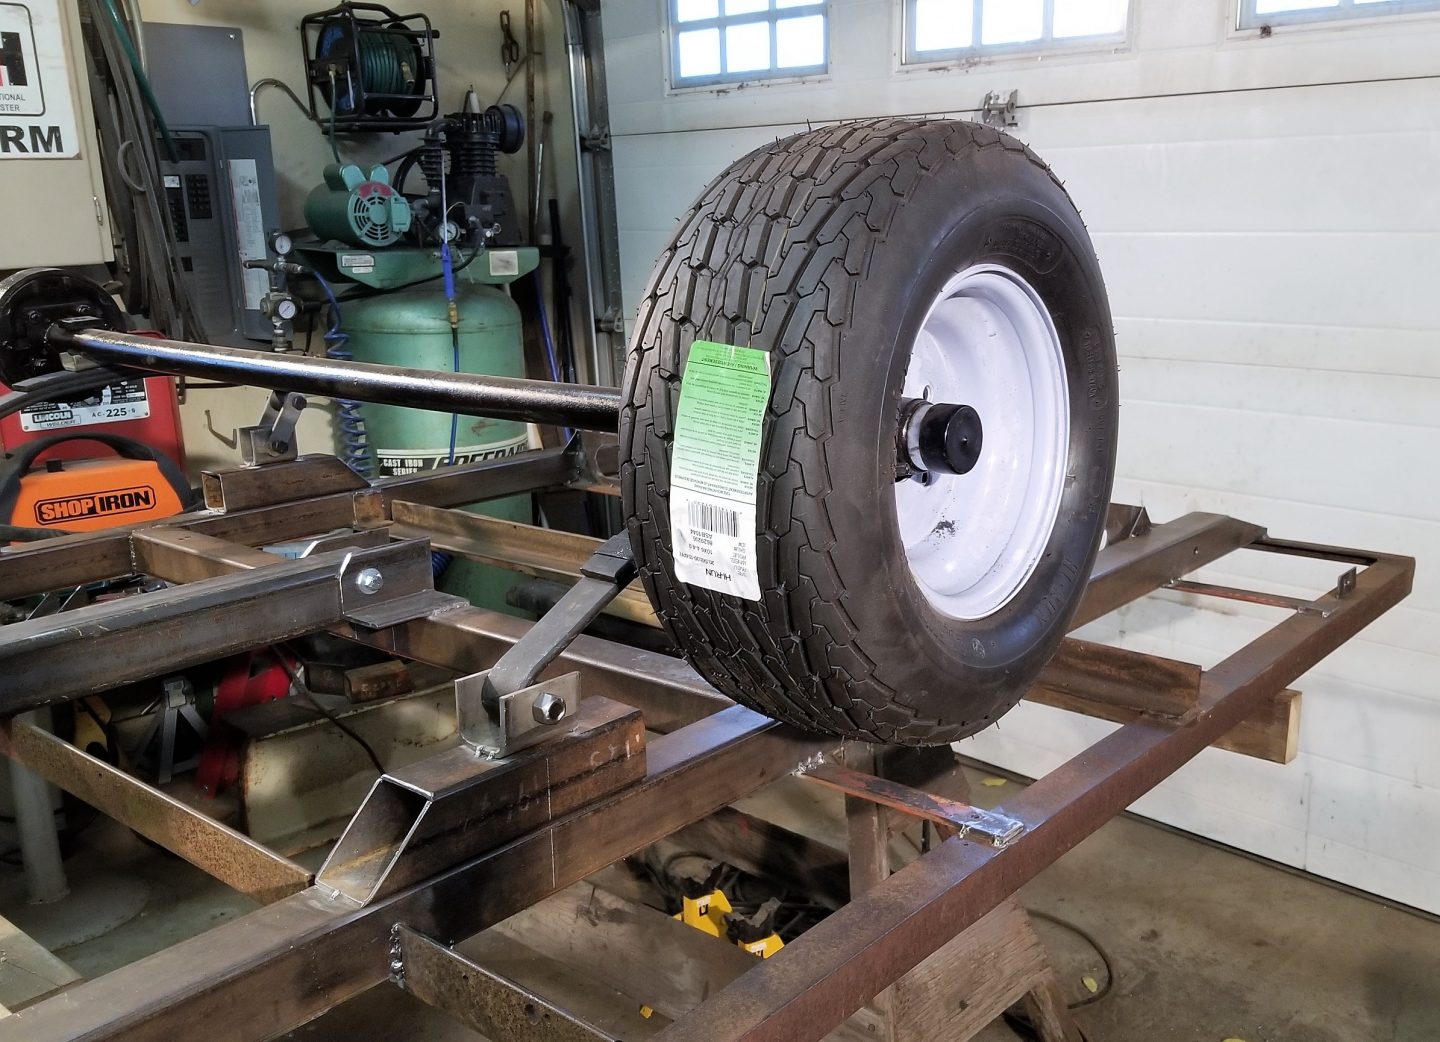
I tacked them in place and attached the springs.. put the axle on top.. and the wheel.. and whadya know three inches of clearance.

Took it all apart and finished up the welds with the big welder.. got to be strong. Ready for the paint ! I randomly choose a brown.. witch turned out more like tan..

It’s like the base coat for a camo paint job.. good enough. And it took two days to dry ! The next step for me is to do the wiring while it’s easy.

All the wires are inside the main frame tubes as much as possible. The side marker lights are LED’s I’ve recessed them a bit to better protect them.

The taillights are not LED.. but they are bright.. and they too are recessed in a rubber grommet. In the past I and others have broken too many trailer lights.. So now I’m careful how and where I mount them.
I am now ready to flip the trailer over on to it’s wheels… and finish the top side.. Time for a new page.. cause there’s much more work to do…