Oct 20 th 2017:
The Frame:
Yesterday I started the process of lifting the body off the frame.. Not too hard to do… I’m working alone. Just need a floor jack and beams.. After taking out the rusty screws. It started raining heavily so I had to quit. Today I’m back at it…

Had to remove the wheels so I could lower the frame more to clear the wheel wells. So I put two 12 ft 4×4’s under the frame and pulled it out with the tractor.. All went well till I bumped one of the jack stands and the body almost fell to the ground.. But I sorted that out and .. the frame came out and the new wheels went on. One of the old wheels had a leak..

And there you have it… one SAD boler frame. Yes it’s light.. but it’s very flimsy too. Never mind the rust.. it’s cracked behind the left wheel…

Apparently this is common.. and it’s only one of the reasons why you want a new frame. Usually the tongue has broken too and someone fixed that.. wow

Look at that ! they even jammed a piece of wood in there.. Let’s just say that this was not a “road worthy” frame.. and build a new one. However first thing I want to do is construct a cradle for the body so it won’t have to sit on those jack stands any more.

Done! I built it to hold the floor and the two ends.. My wheels are a bit wimpy but it’s all I got .. and they should help when I need to move it into the shop.. Now I stare at the frame and wonder where to start. Some have built the new frame on top of the old one.. so as to get things aligned properly. One thing I need to figure out is just how different the suspension will be. The factory axles are Dexter Torflex. And still available.. but costly to ship. I bought the ones from Princess Auto.. made by the same company but they say 22 degree angle.. and the boler axle should be 10 degrees up and pointing forward.. A strange thing for sure.. but successful. However the old axle IS the same as the new one at 22degrees. Soooo I will flip the new ones ( they don’t say you can’t) and I will mount them an inch lower.. not much of a gain in height.. but still something.

Here’s the old and new.. for comparison.. The mounts are different ..but then the whole frame will be anyway.

One thing for sure ..this sag won’t be there ! That’s the new frame tube on top.. I’m kicking the old frame outside .. and cleaning up the new pieces.. everything is measured and the plans are drawn. Here’s the first frame video…
Well I did kick the old frame out and made a jig on my saw horses to build the new frame..

The debate still goes on which way to mount the axles.. I’m tending to favor the rear configuration.. it will lift the trailer by 4 inches.. but I’m thinking that’s good.. cause I saw damage to the old frame from hitting things. There was about 8 inches of clearance under the trailer.
Oct 22 2018: I’ve decided to have the arms up and leading the axle. And for a bit of extra height I’m adding a 1- 1/2 ” block between the frame and the axle. I should be within 1 – 2 inches of the factory height. This makes the door sill proper height.. you won’t need a step. And that’s the way boler’s should be.

I now have my four cross pieces welded in place .. That’s four more than the old frame had. The frame has been squared and corner braces added

The C – channel I used is from the Tent Trailer frame… light but strong. I’m cutting the tubes to build up the 6 ” drop for the floor pan. but since I’m working upside down it’s up…

I will cut the door opening after I have the frame braced. Oh.. and the old frame is no more.. I cut it up to use some of the better pieces. Would have been nice to keep it intact so I could show a side by side comparison.. but I don’t want to buy metal.. ya I’m a bit cheep. Re-use and Re -cycle.. that’s the way I roll.

It’s coming along nicely.. There’s the door opening. Used some bits from the old frame for this too. Lot’s of welding going on here..

Got to have a place for the propane tanks.. And a battery in front of that. Plus all this helps brace the frame. The down side is the weight.. I plan on weighing it when I’m done.. and I expect a few hundred pounds more. The up side is that this frame won’t need the body for support.. So the body is simply carried.

Here’s my new rear bumper.. it’s a work of art using pieces from the old frame. Also it’s longer to protect the width of the trailer. still needs a spare tire mount and the rear stabilizer jacks will be mounted too. I will make this slide into the frame and bolt in place. If I welded it that would make it harder to roll the frame under the body.
Oct 30 th 2017: It’s looking like I’ll finish the frame earlier then I thought. I got all the welding done.. cleaned up … and painted the bottom of the frame today..

Here’s the axles on.. and the two supports for the floor..

And now most of it is shiny black. I turned the heat up to dry the paint better too. Then I thought of a way to estimate the weight of the old frame. .. by weighing the bits. I estimate it to be 230 lbs. + / – 30 lbs. But at least I will know how much heavier the new frame is.

Nov 1 2017: Well I rolled the frame out of the shop.. parked it next to the body.. I’m so nervous thinking I got the sizes wrong.. But it looks like a fit . I want to take it and weigh it to see just how much heavier it ended up being.
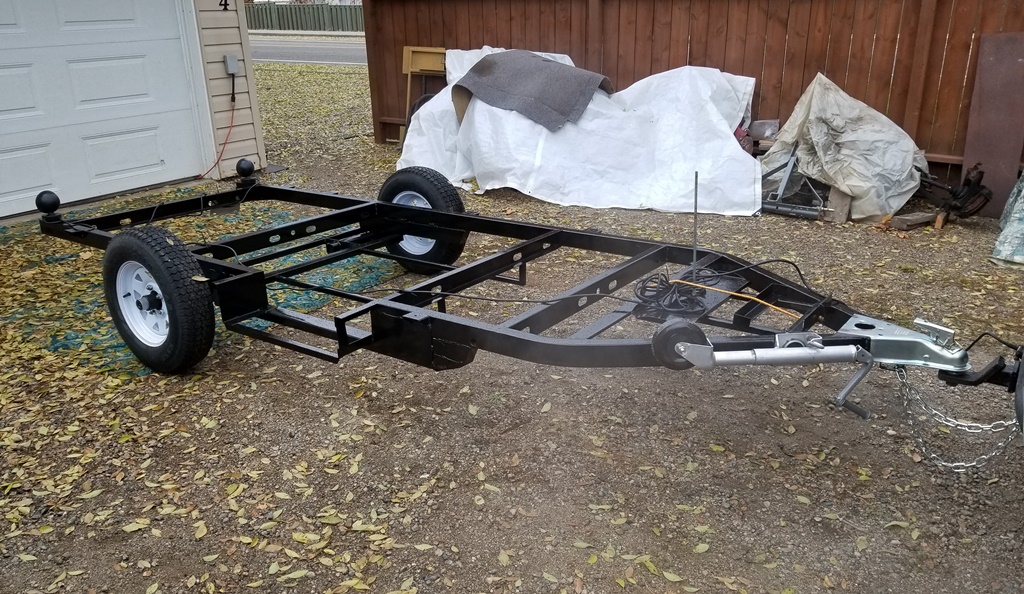
And off to the scales and the landfill. And wouldn’t you know it ! Lighter than expected ! 330 lbs on the nose. That’s approximately 100 lbs more than the old rusty frame. Right on target.. I’ve still working on the rear bumper.. but the frame will stay outside now.. Like any good trailer.. :).
It’s done now on to the BODY #3